Art Ed: Jim Dine Heart Sculptures
Giving students the chance to experience materials, processes, and artists from a young age is really important. I don't have memories of school art until I was in second grade so most of my early experiences were at daycare and at home. I have a mom who engaged me artistically so it worked out in the end. A lot of my parents are scientists, doctors, or others to whom creativity does not come naturally. I'm not generalizing here. I've had a lot of conversations with parents who want the same kind of exposure because they can not offer it themselves. That's a conversation for another time, but back to exposure...
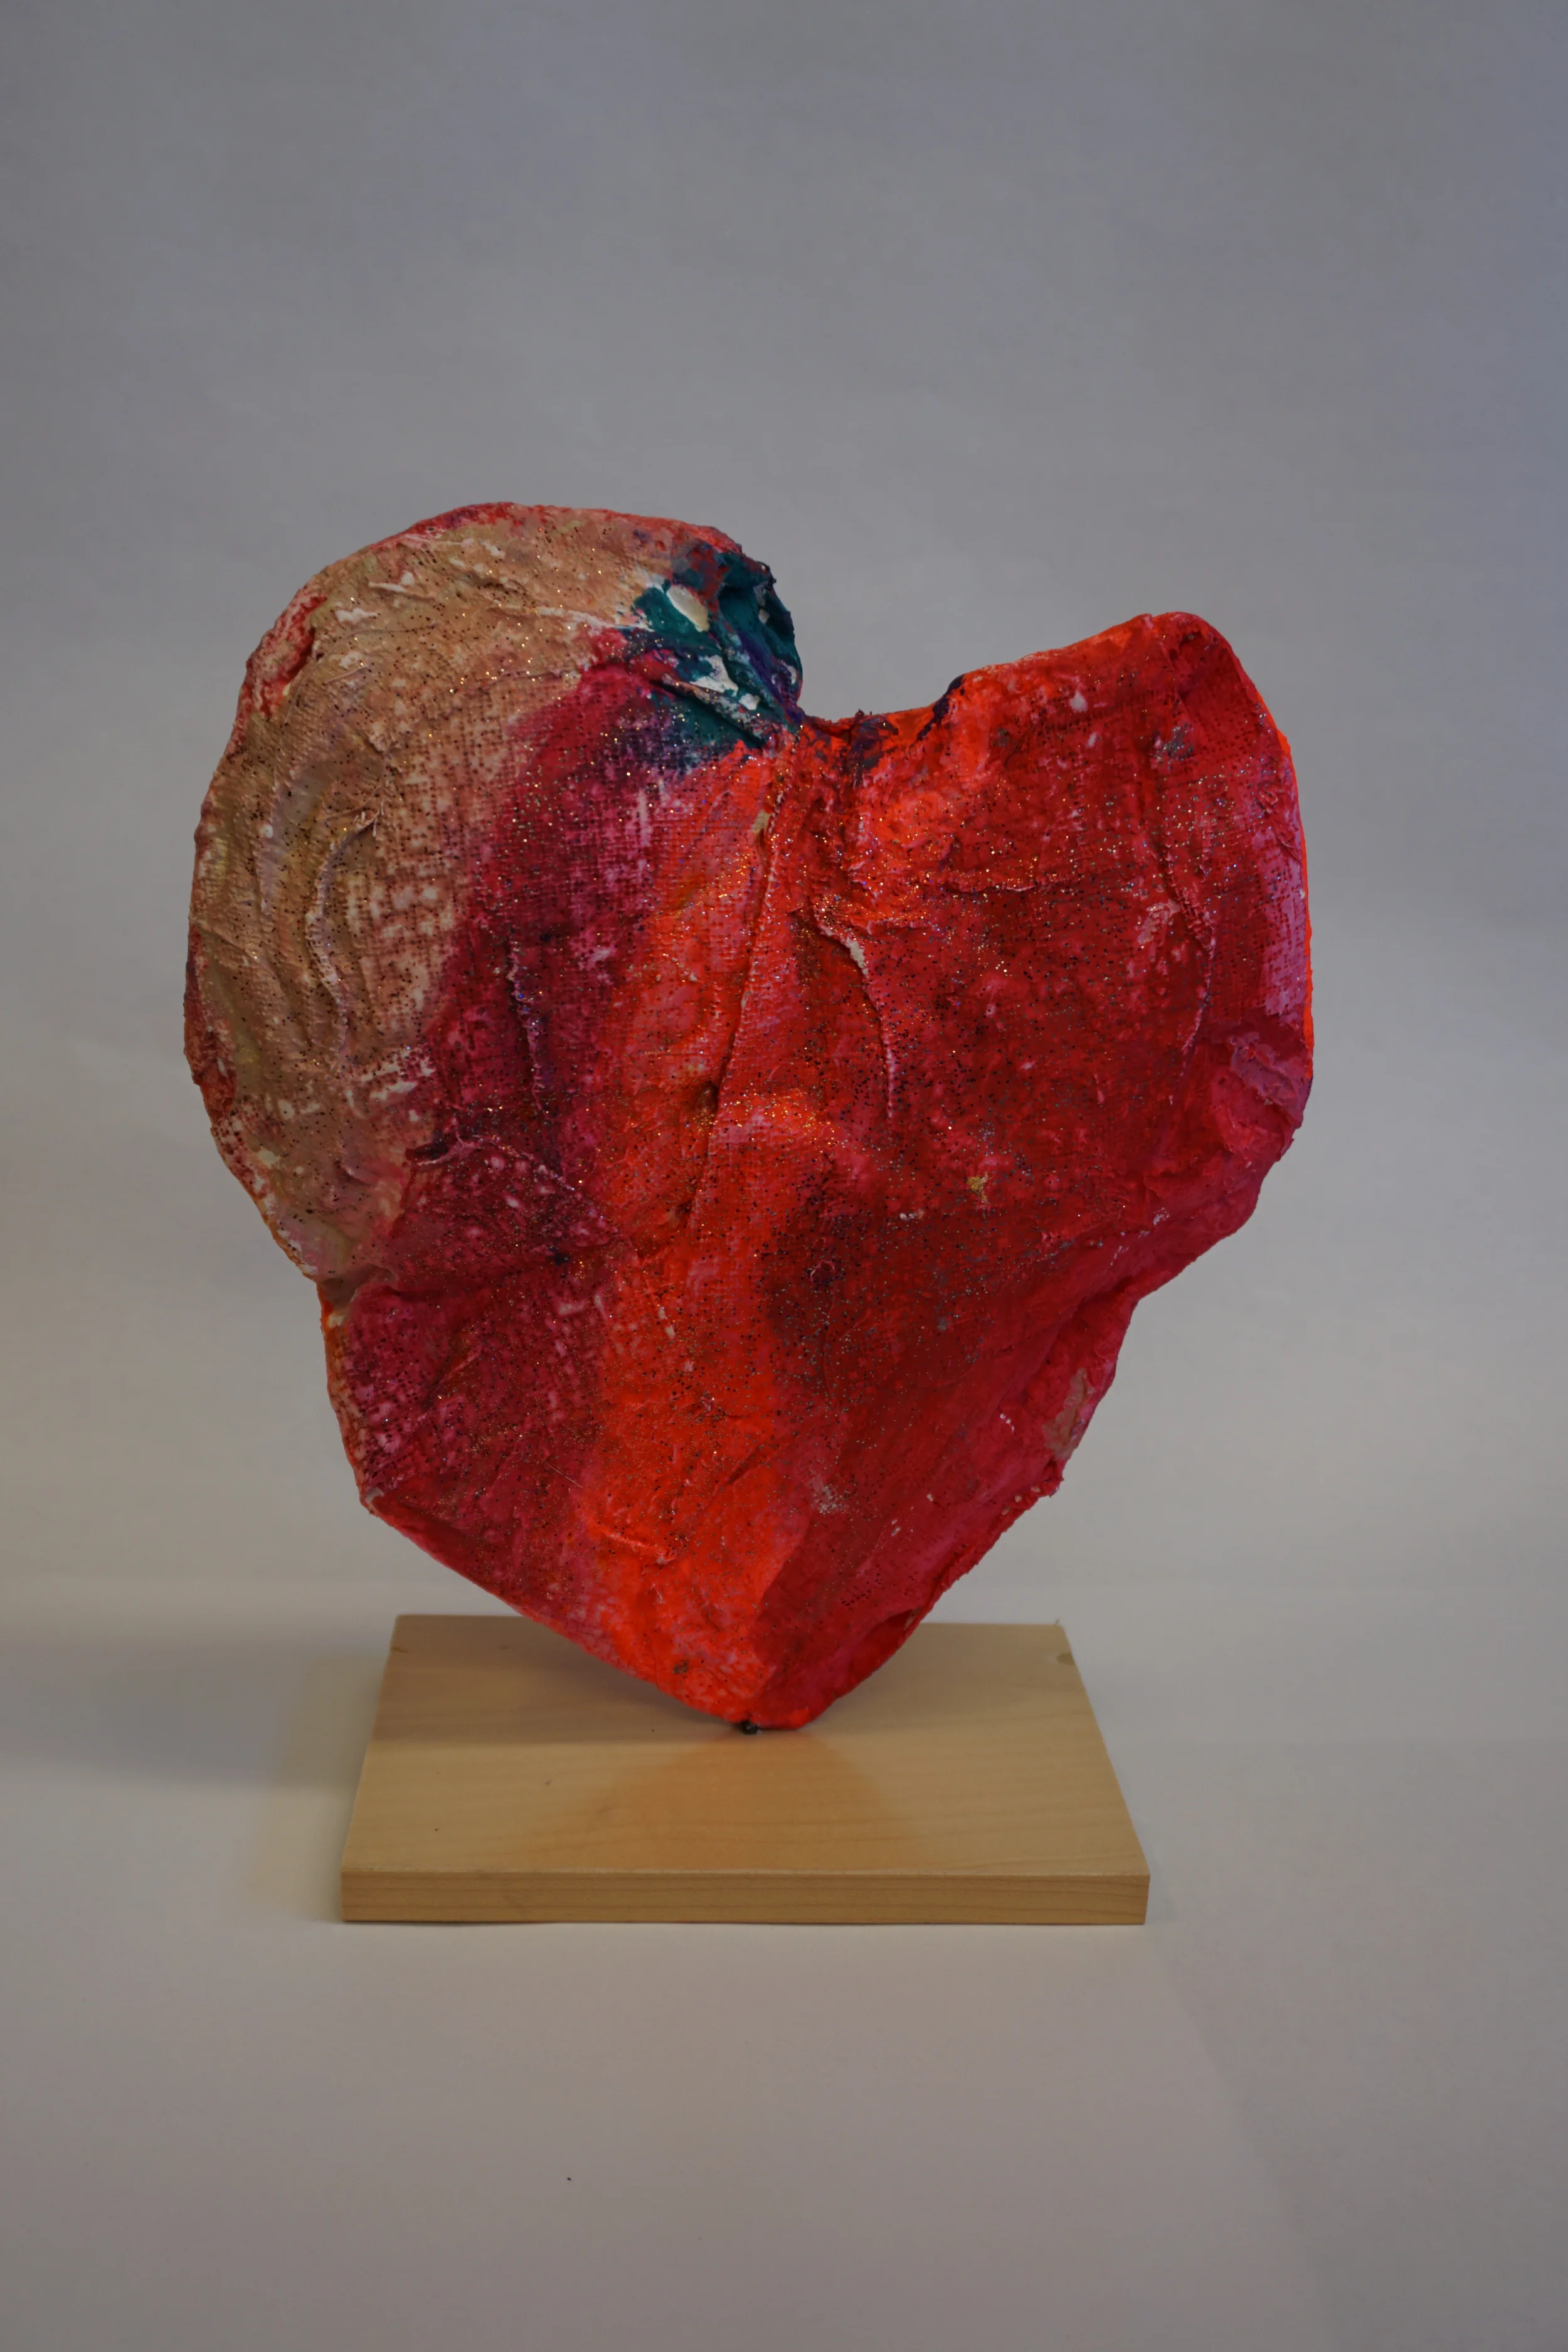
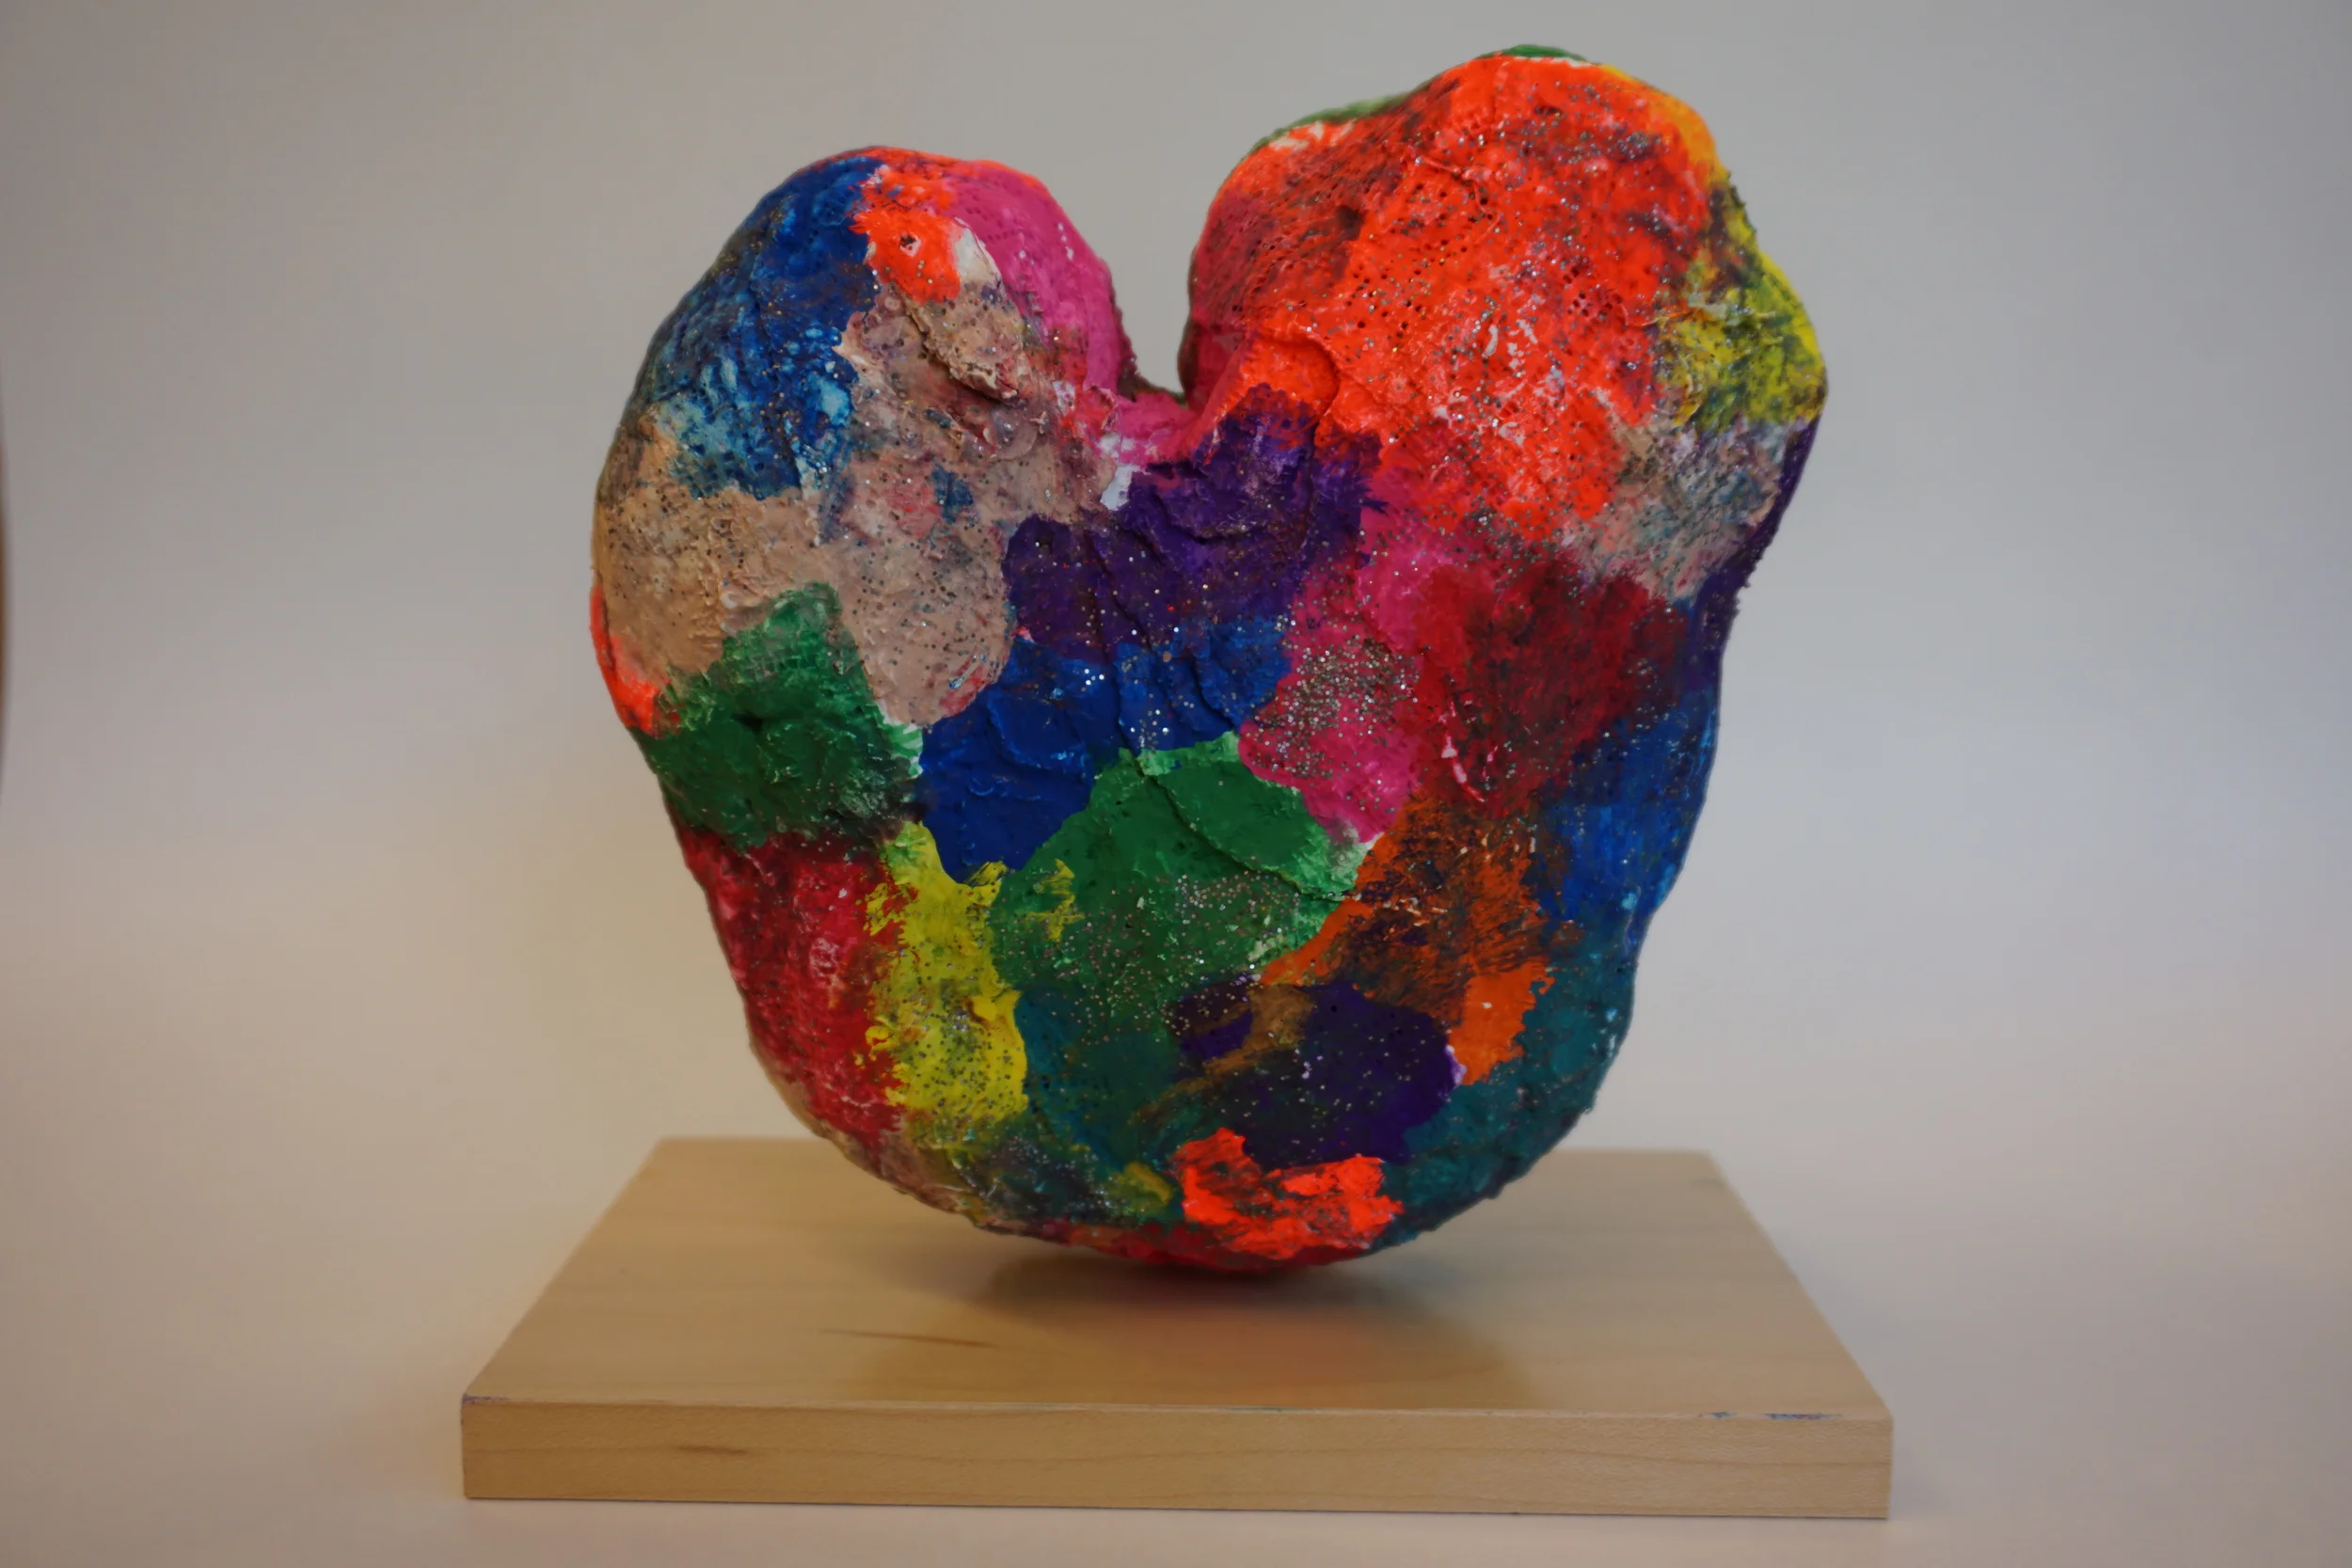
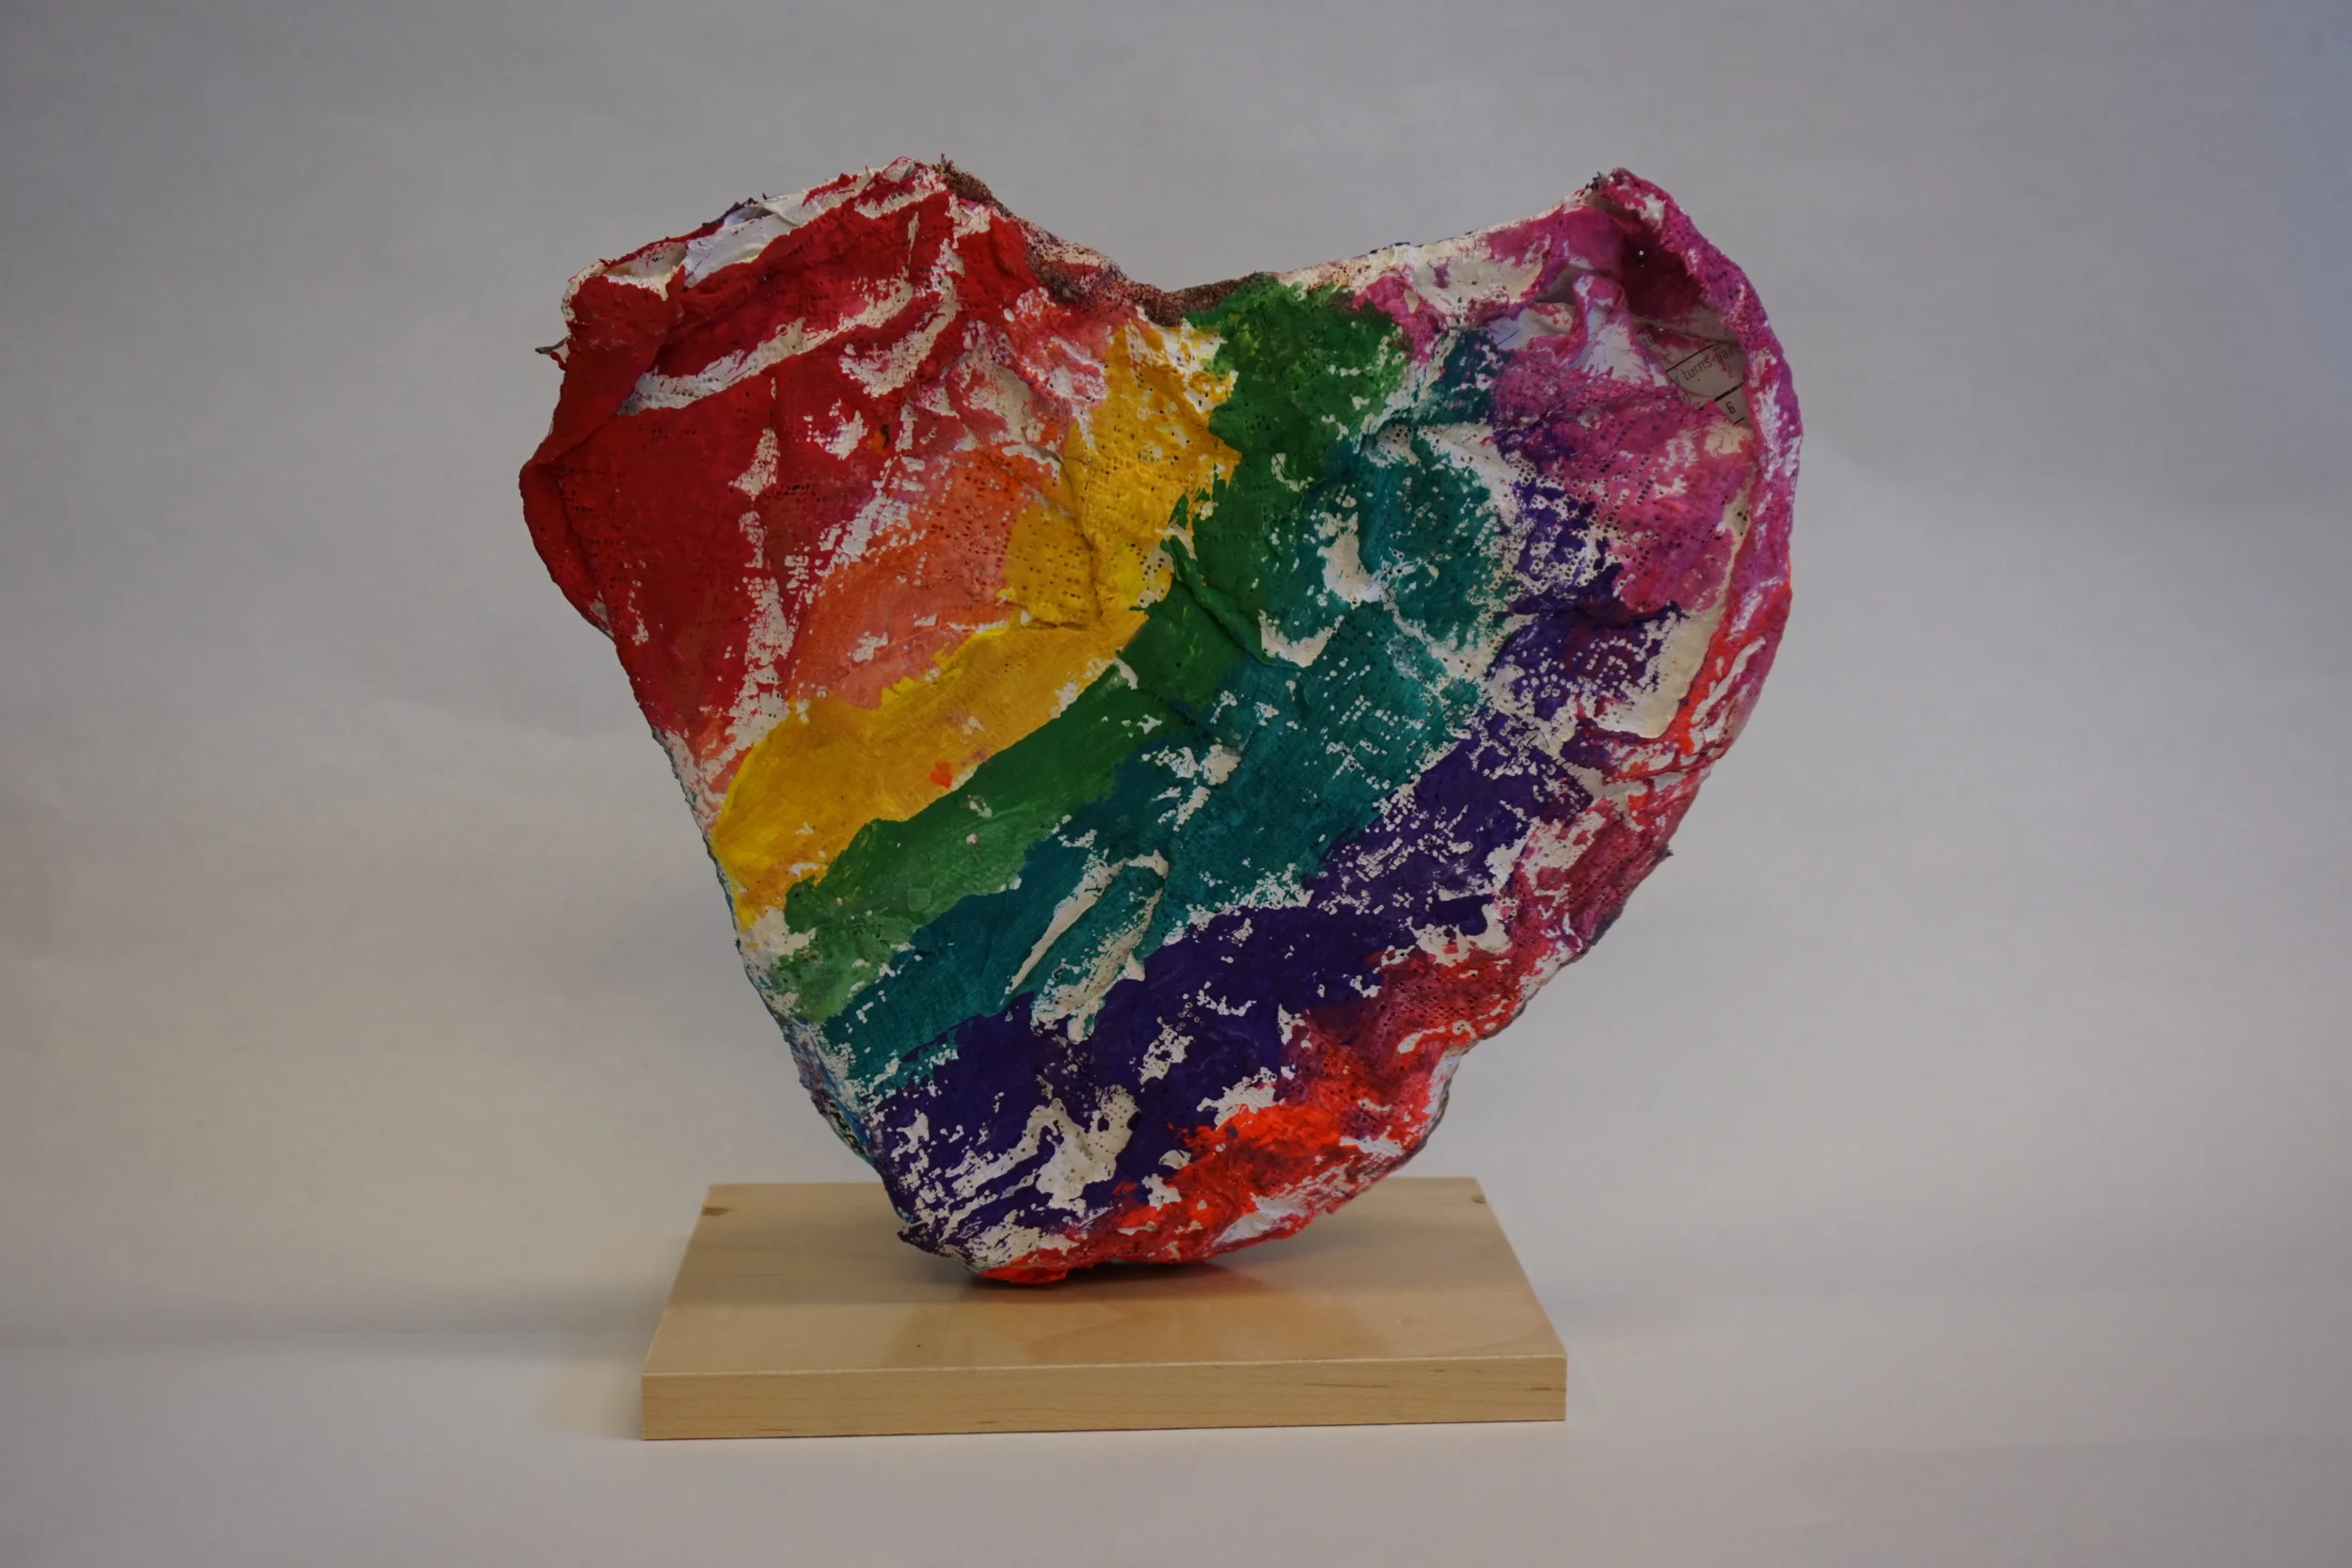
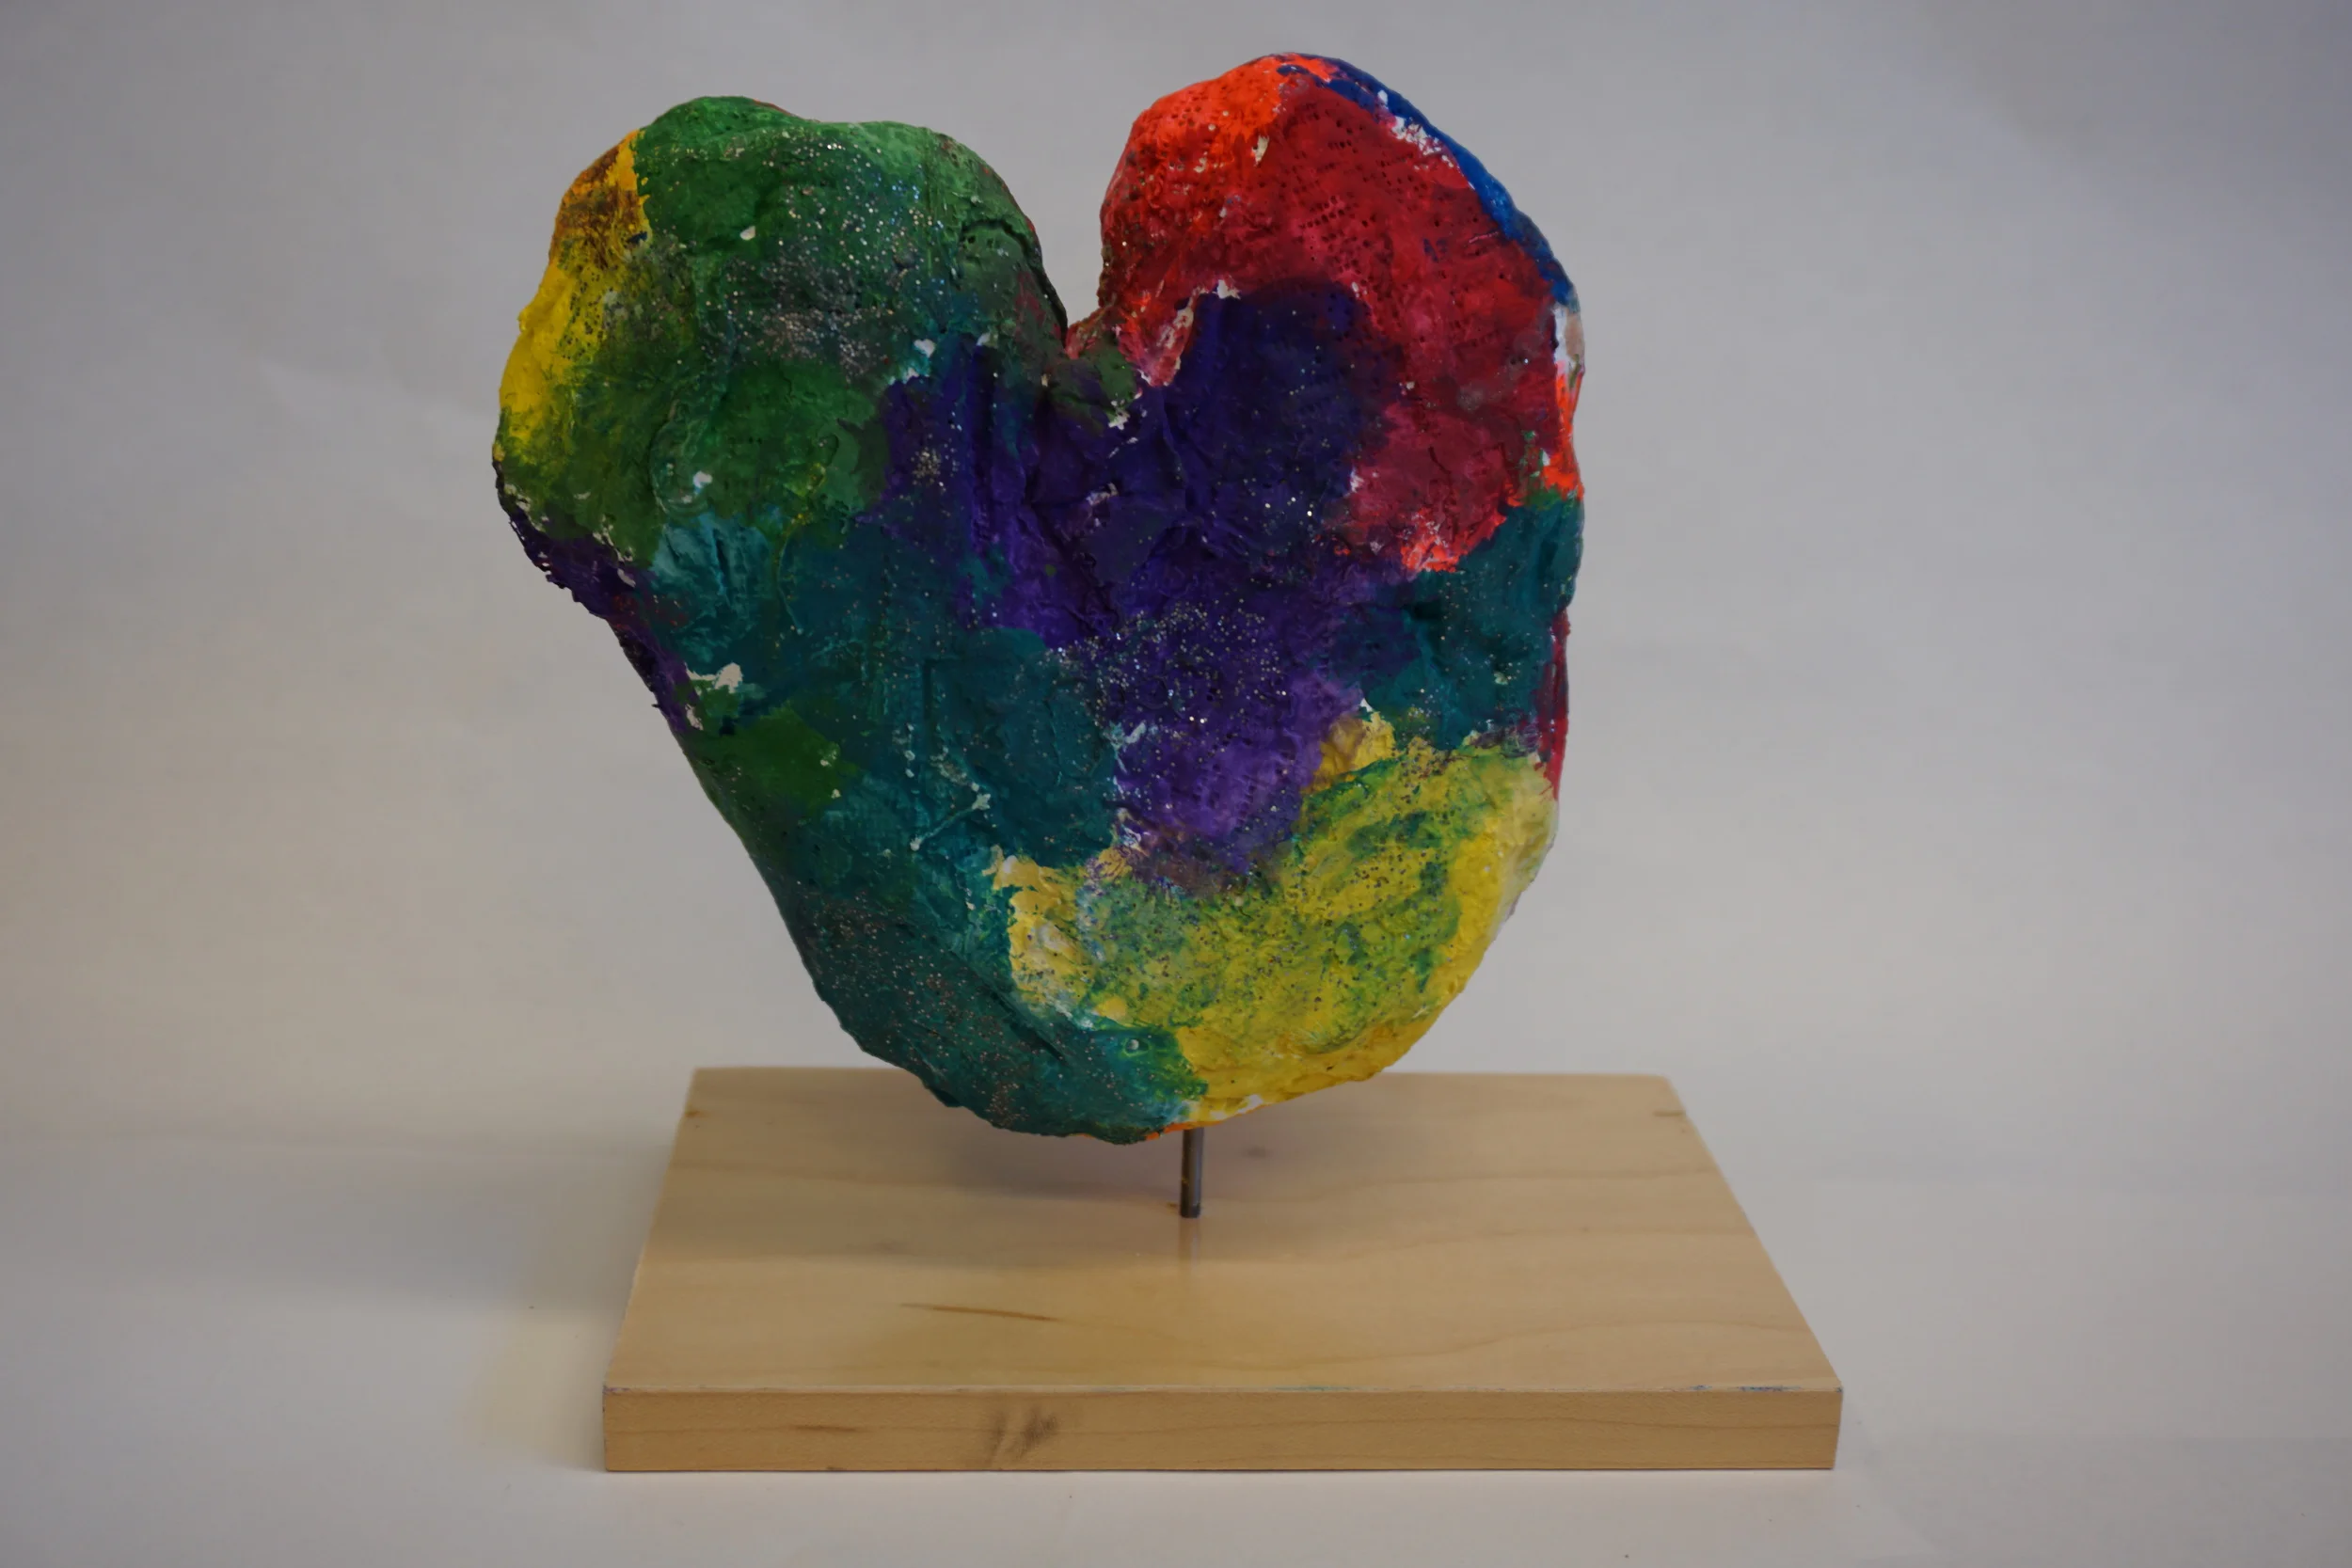
I've had two huge rolls of plaster cloth sitting around and I wanted to utilize it. My first experience with plaster cloth was in fifth grade when we made hot air balloons from the plaster cloth and strawberry baskets. It hung in my bedroom until I was in high school- I was so proud of it. For this project I chose Jim Dine and his hearts as the subject for a sculpture. The heart shape is simple enough that working with a tough material like plaster cloth will still be successful. I started with some images of Jim Dine's hearts and we discussed what Pop Art is, his use of color and texture, and what abstraction is. These were the main points I chose to hit on but they were not the only things we talked about.
Materials:
+ scrap paper
+ masking tape
+ plaster cloth
+ water
+tempera paint
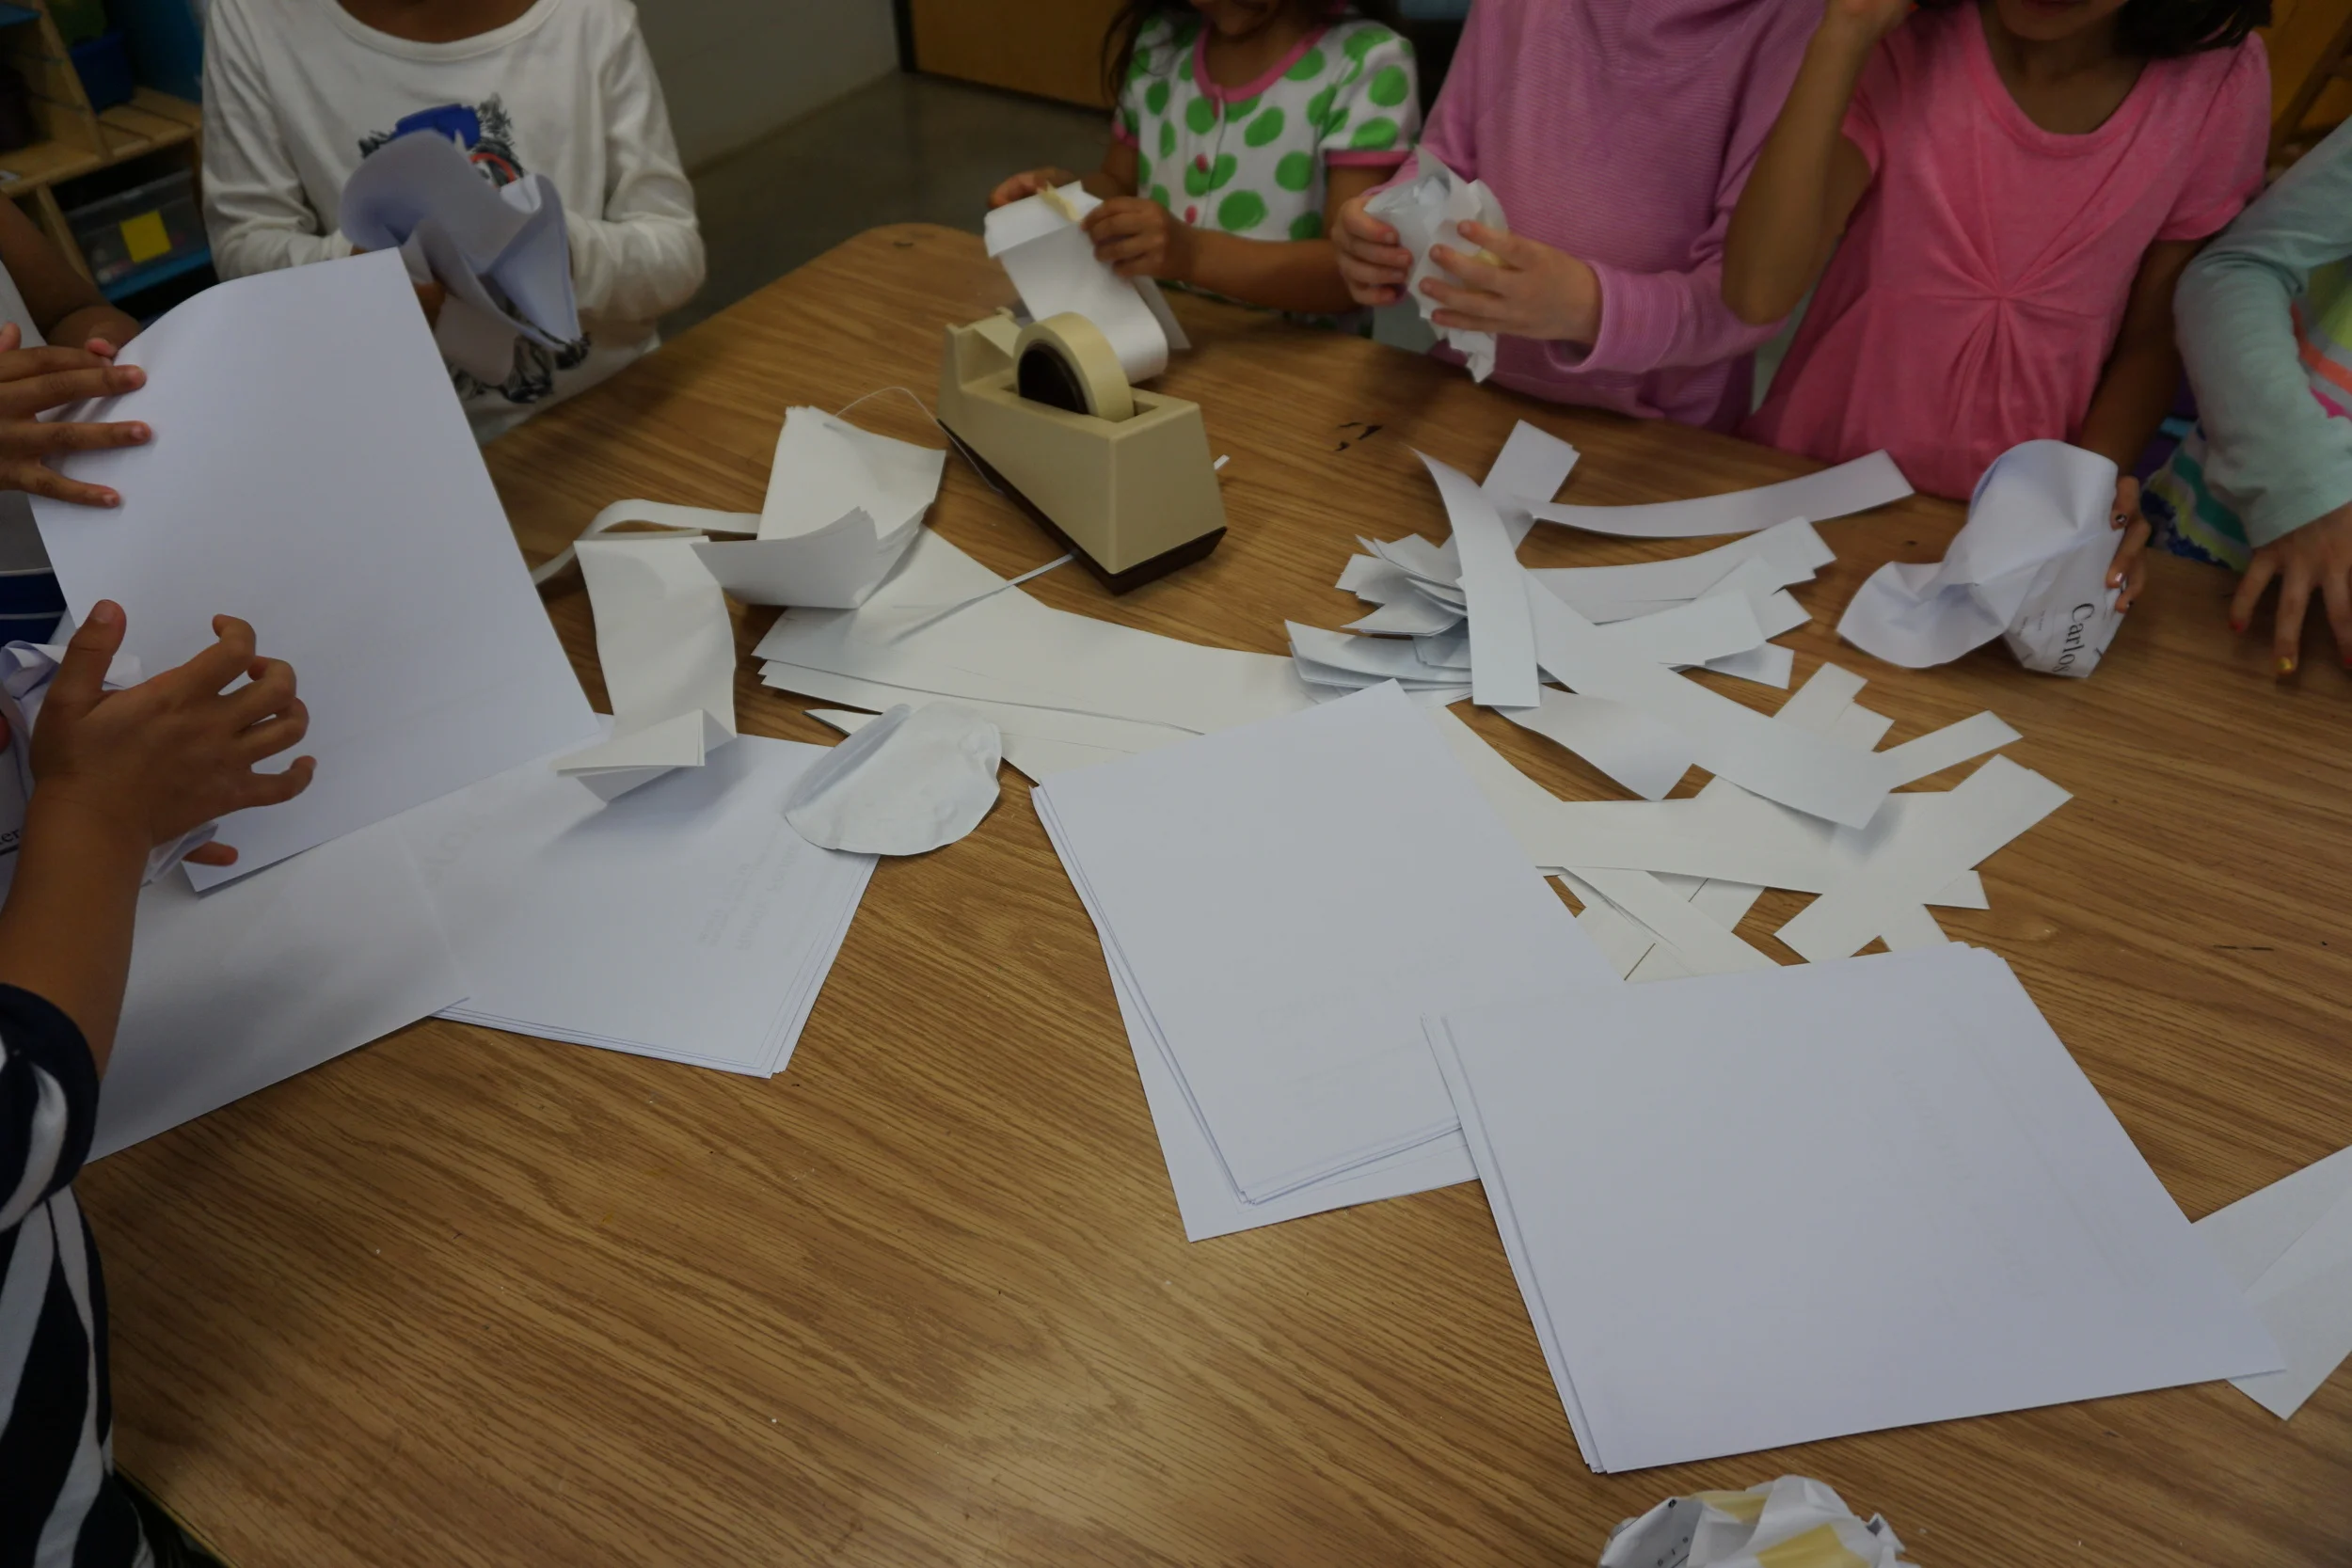
I dumped the contents of our workroom recycling box onto two tables and demonstrated crumpling paper up to create a heart shape. Using the masking tape to hold it together, I kept building until I had a heart I was happy with.
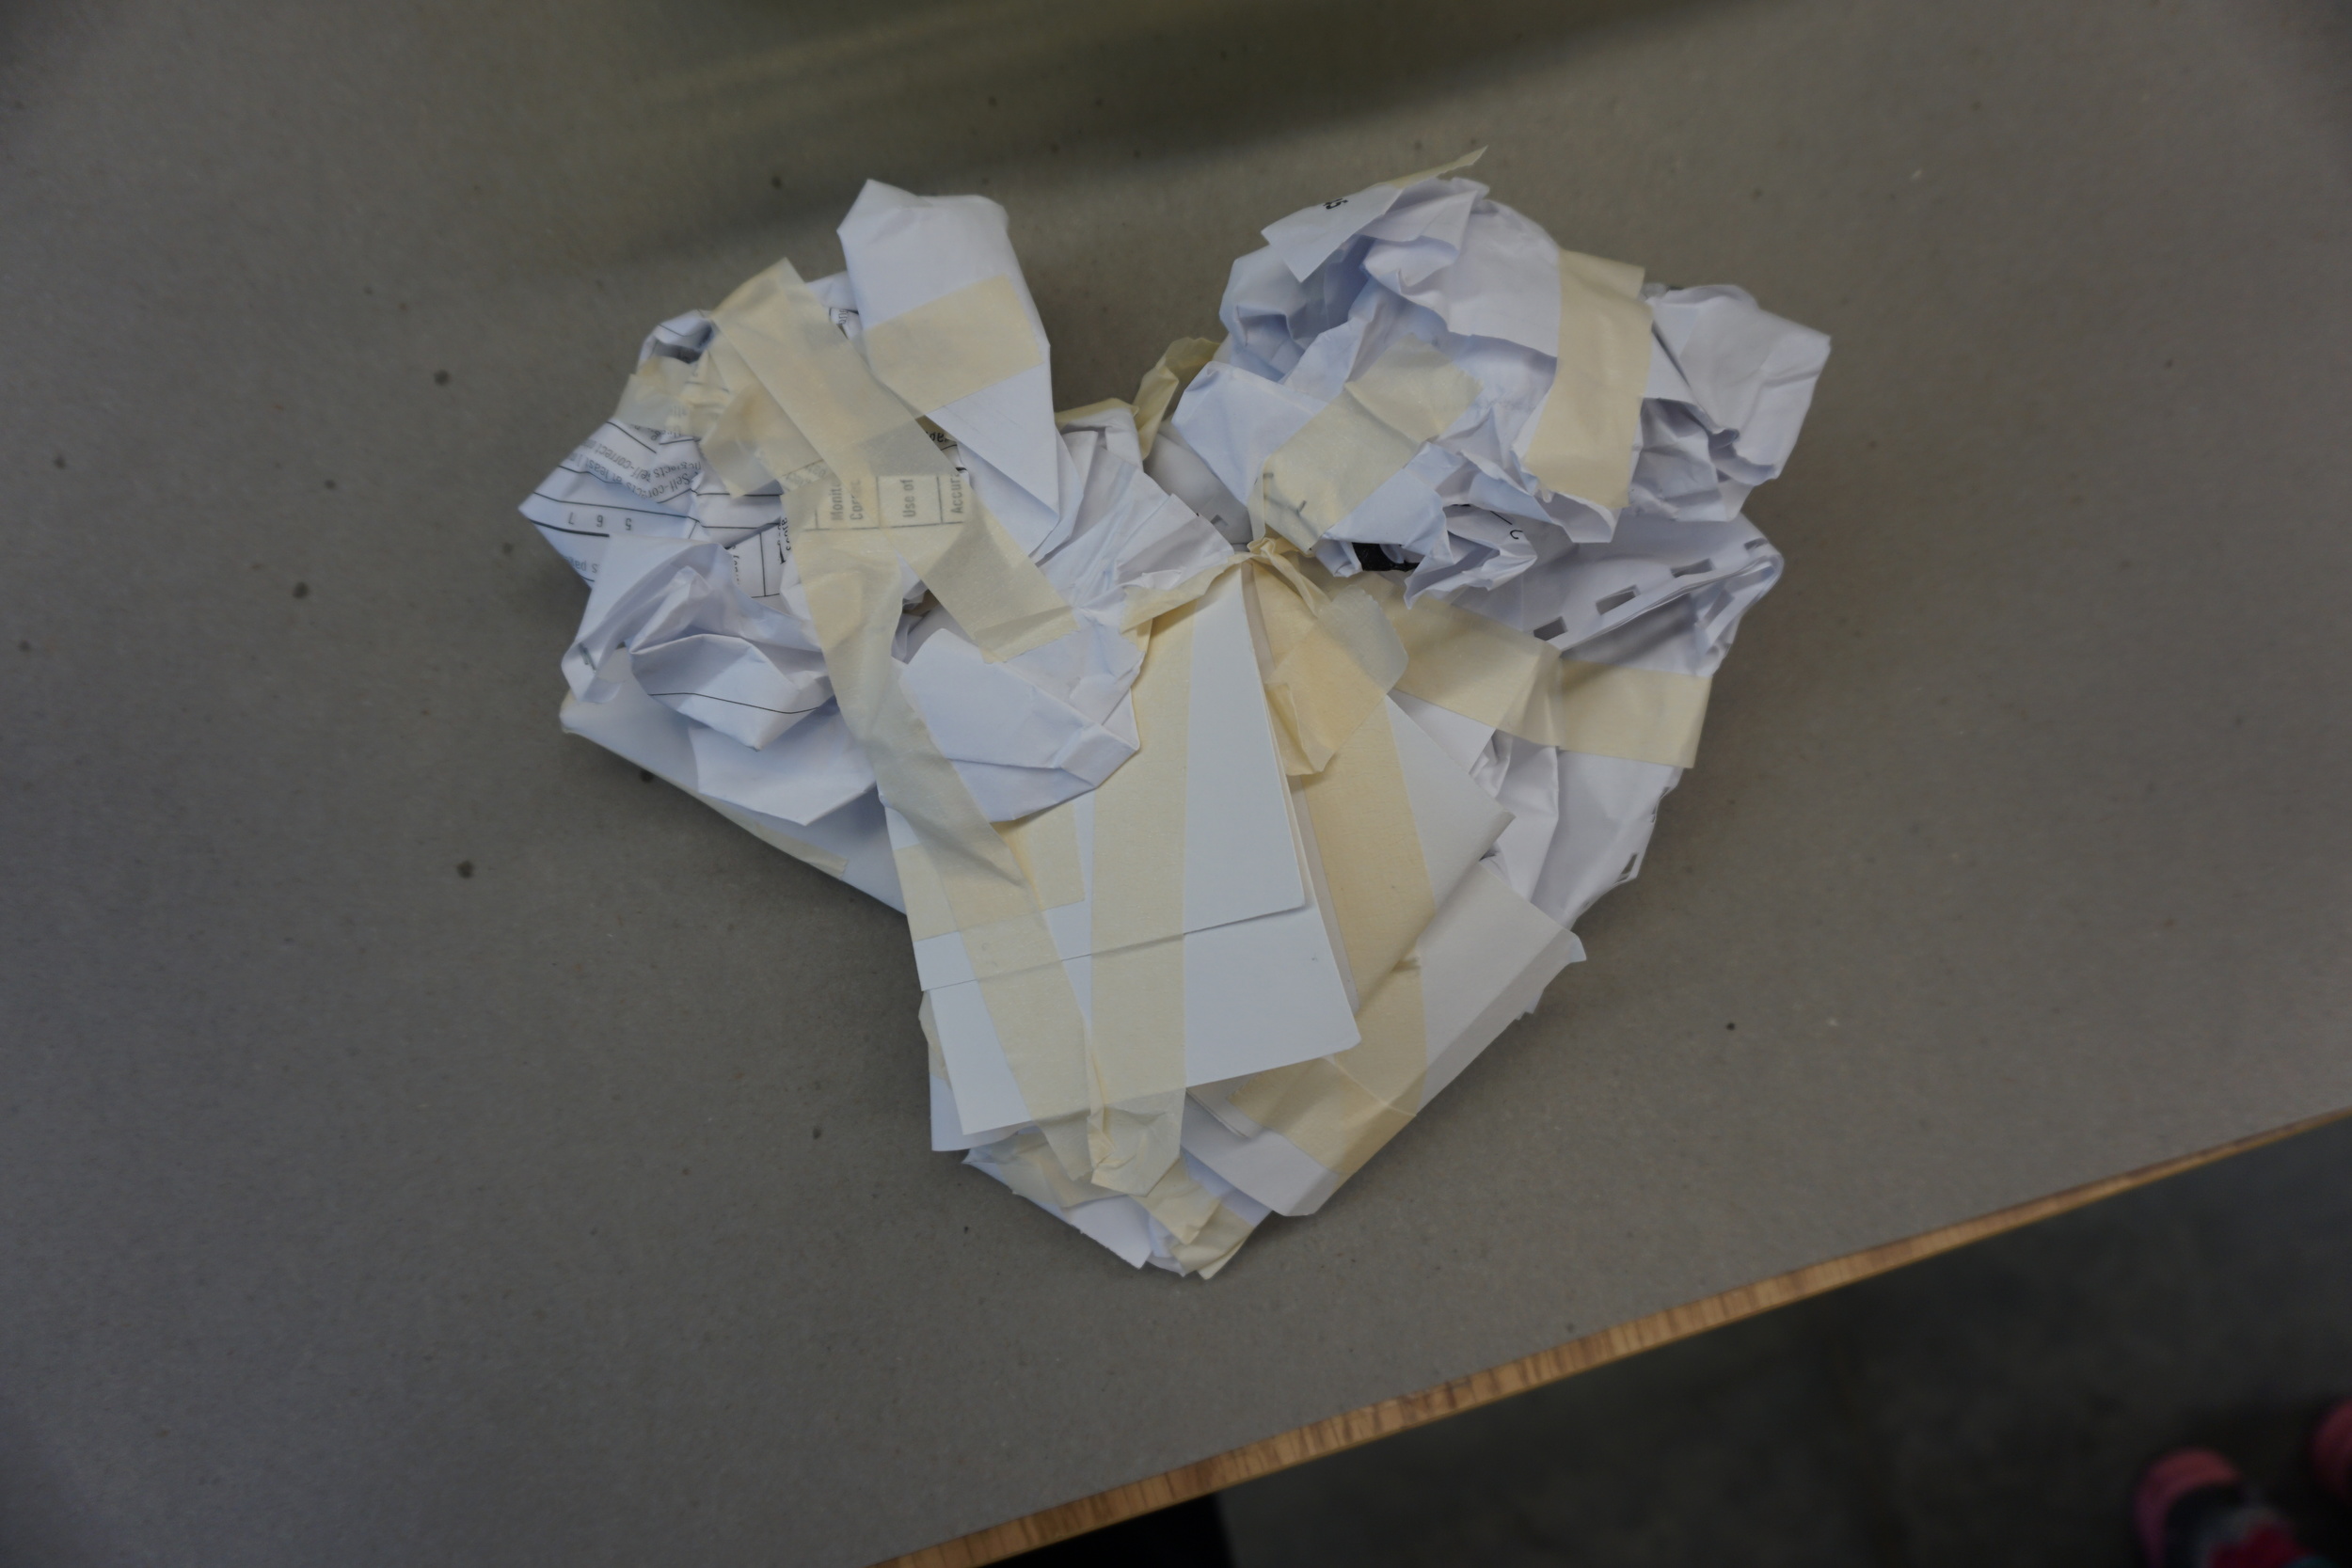
I did have to help some of the younger students with the round parts of the heart.
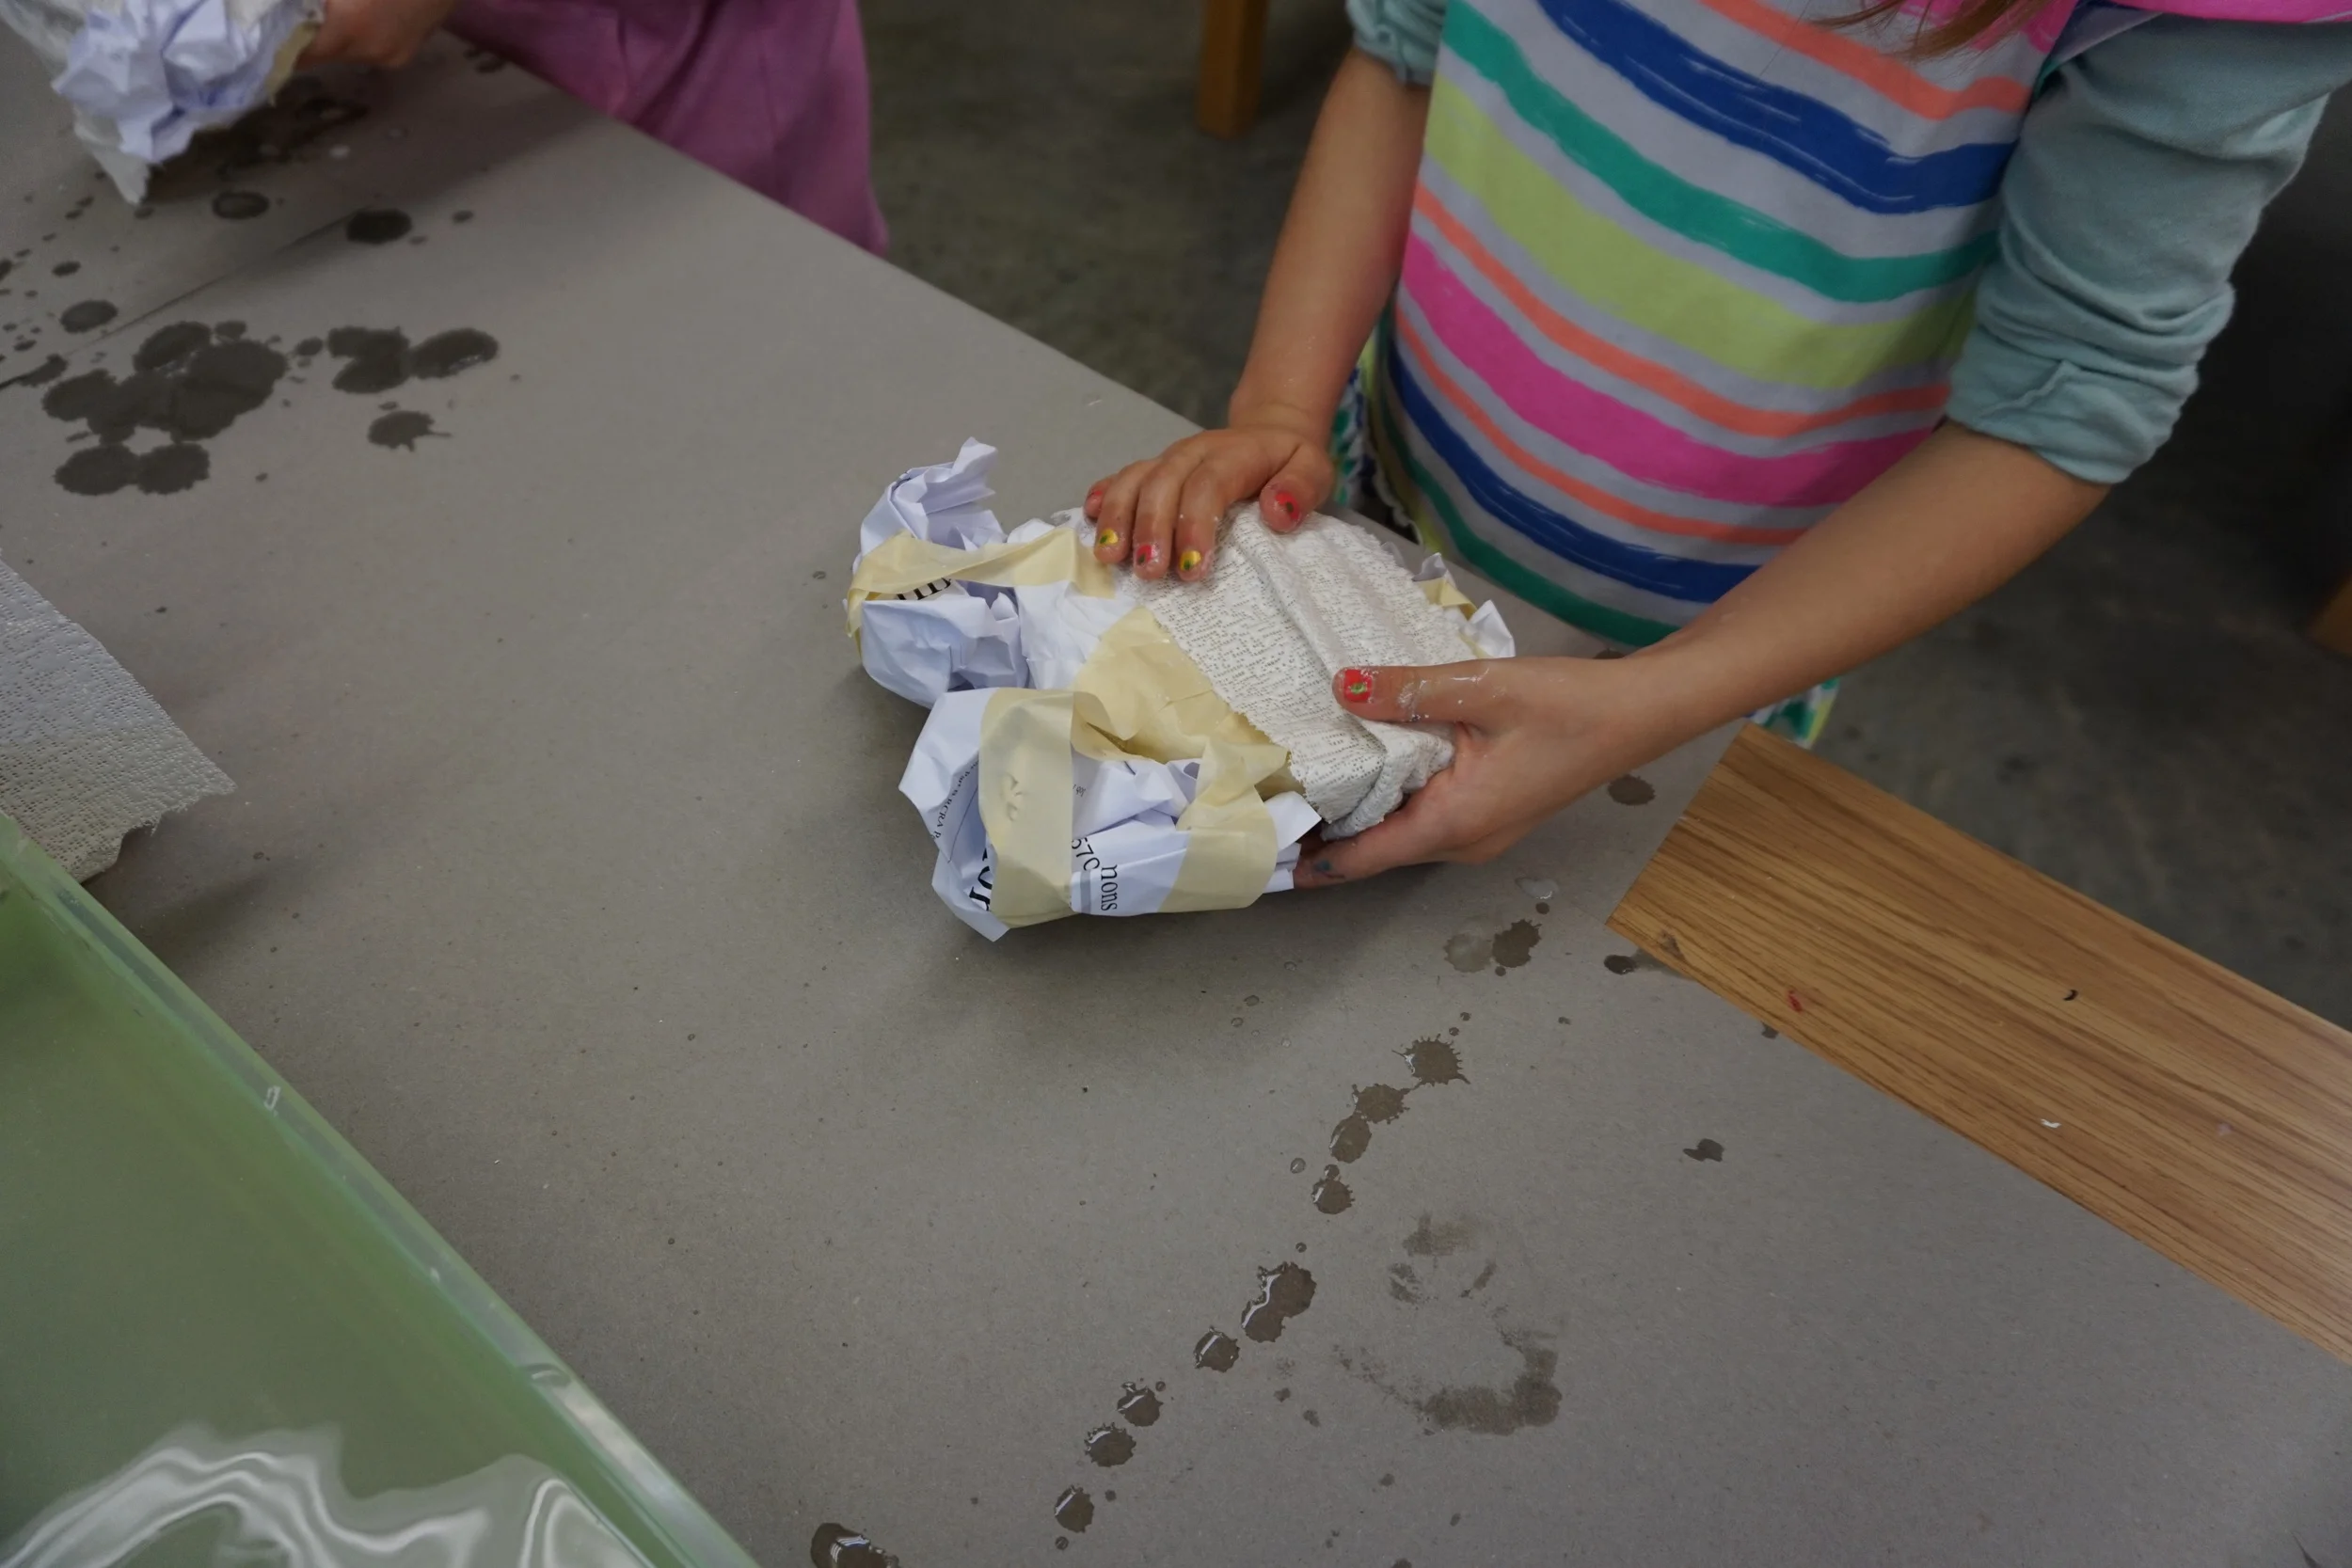
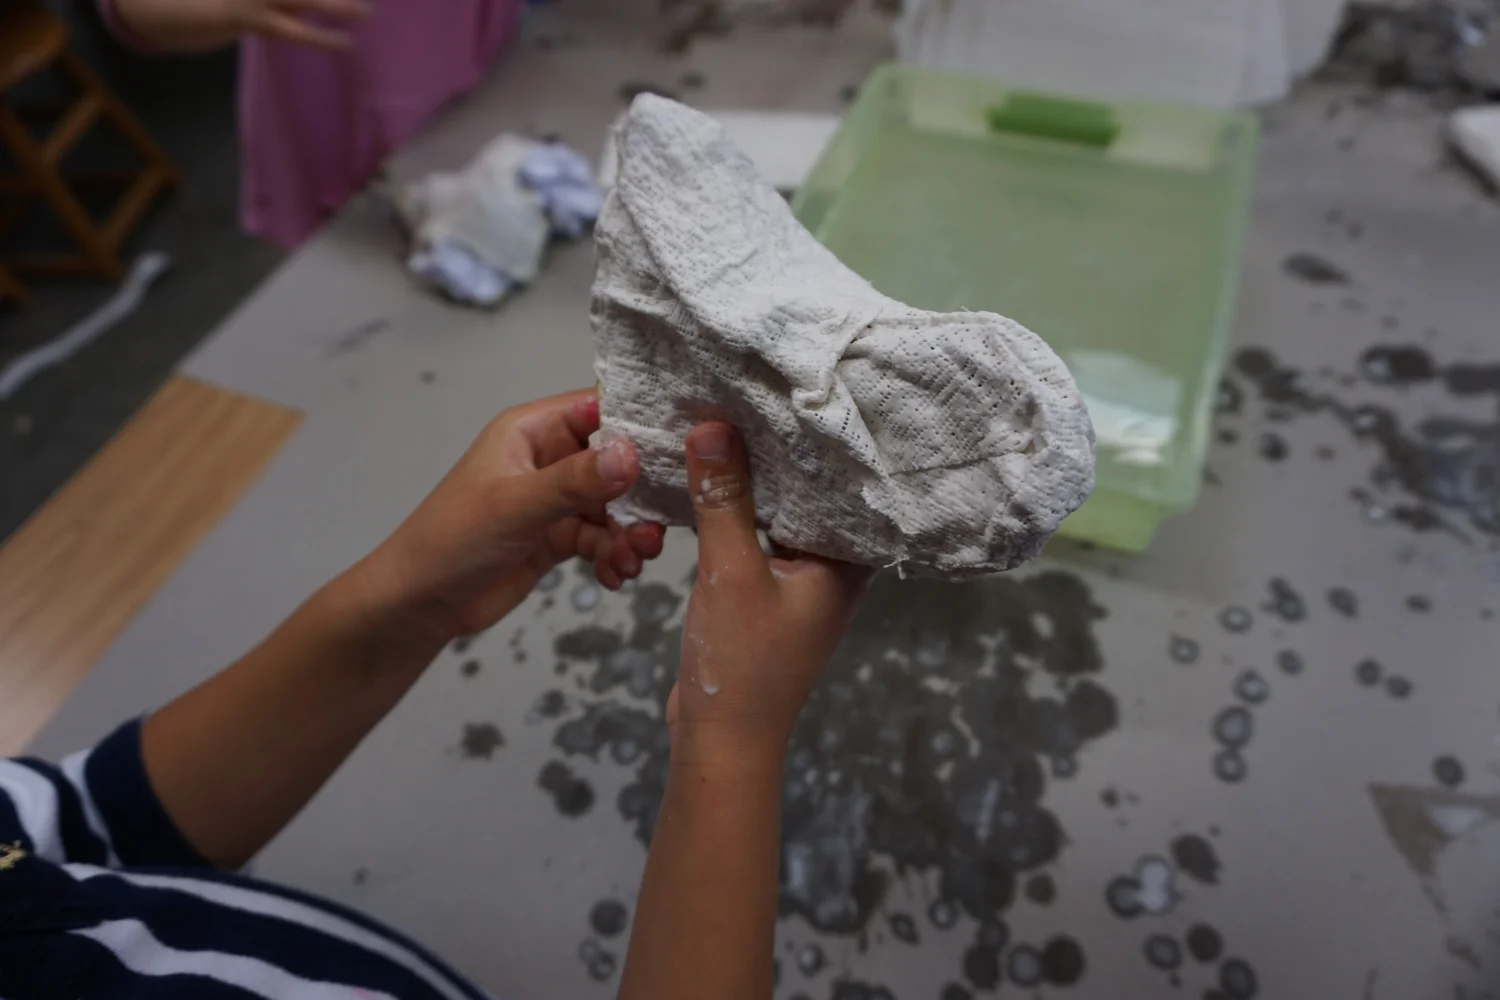
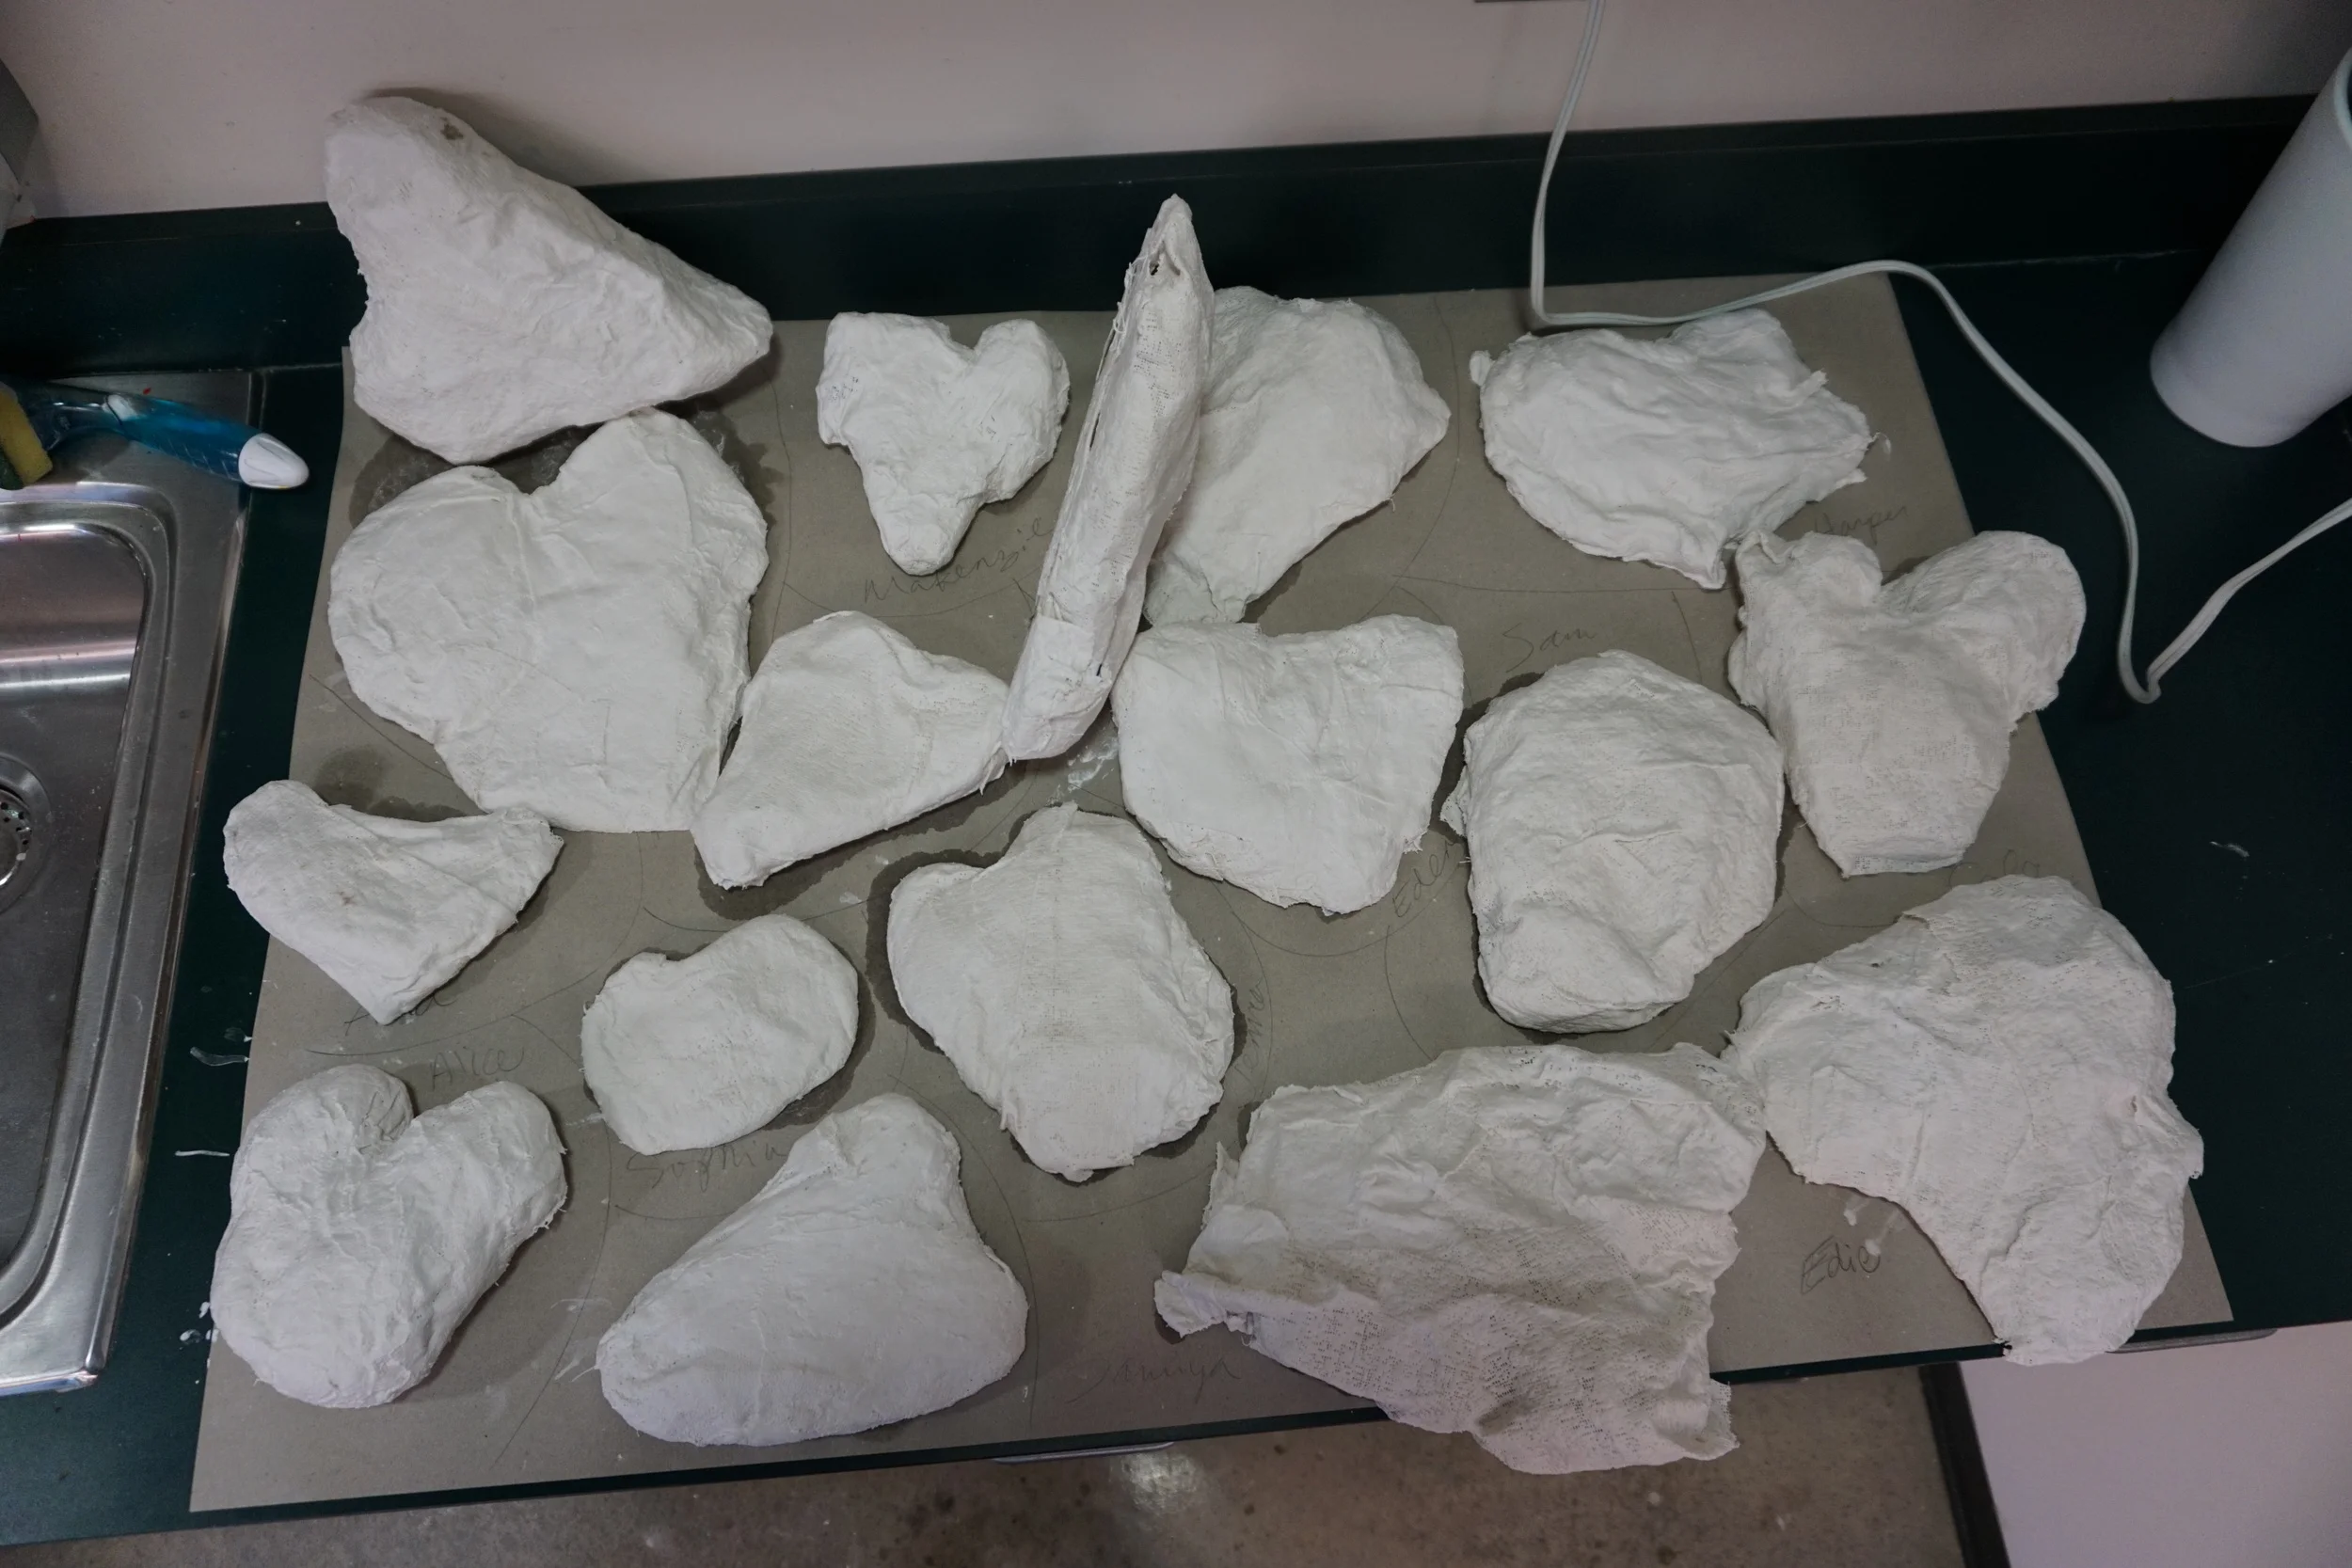
At three tables I set out paper and two shallow buckets of water. Dispersed around the table were stacks of cut up plaster cloth. Students worked until they covered the front, back, and sides. Before washing their hands I had them dry some of the plaster mess off their hands with a paper towel to reduce the mess in the sinks. I set up a space of my sink counter with paper so the hearts had a place to dry. The paper was convenient because I could write their names on it and not mess with the wet plaster or name tags. Win. It took about three days of rotating for the heart forms to dry. Luckily I see this class once a week and they were bone dry by the time they came back.
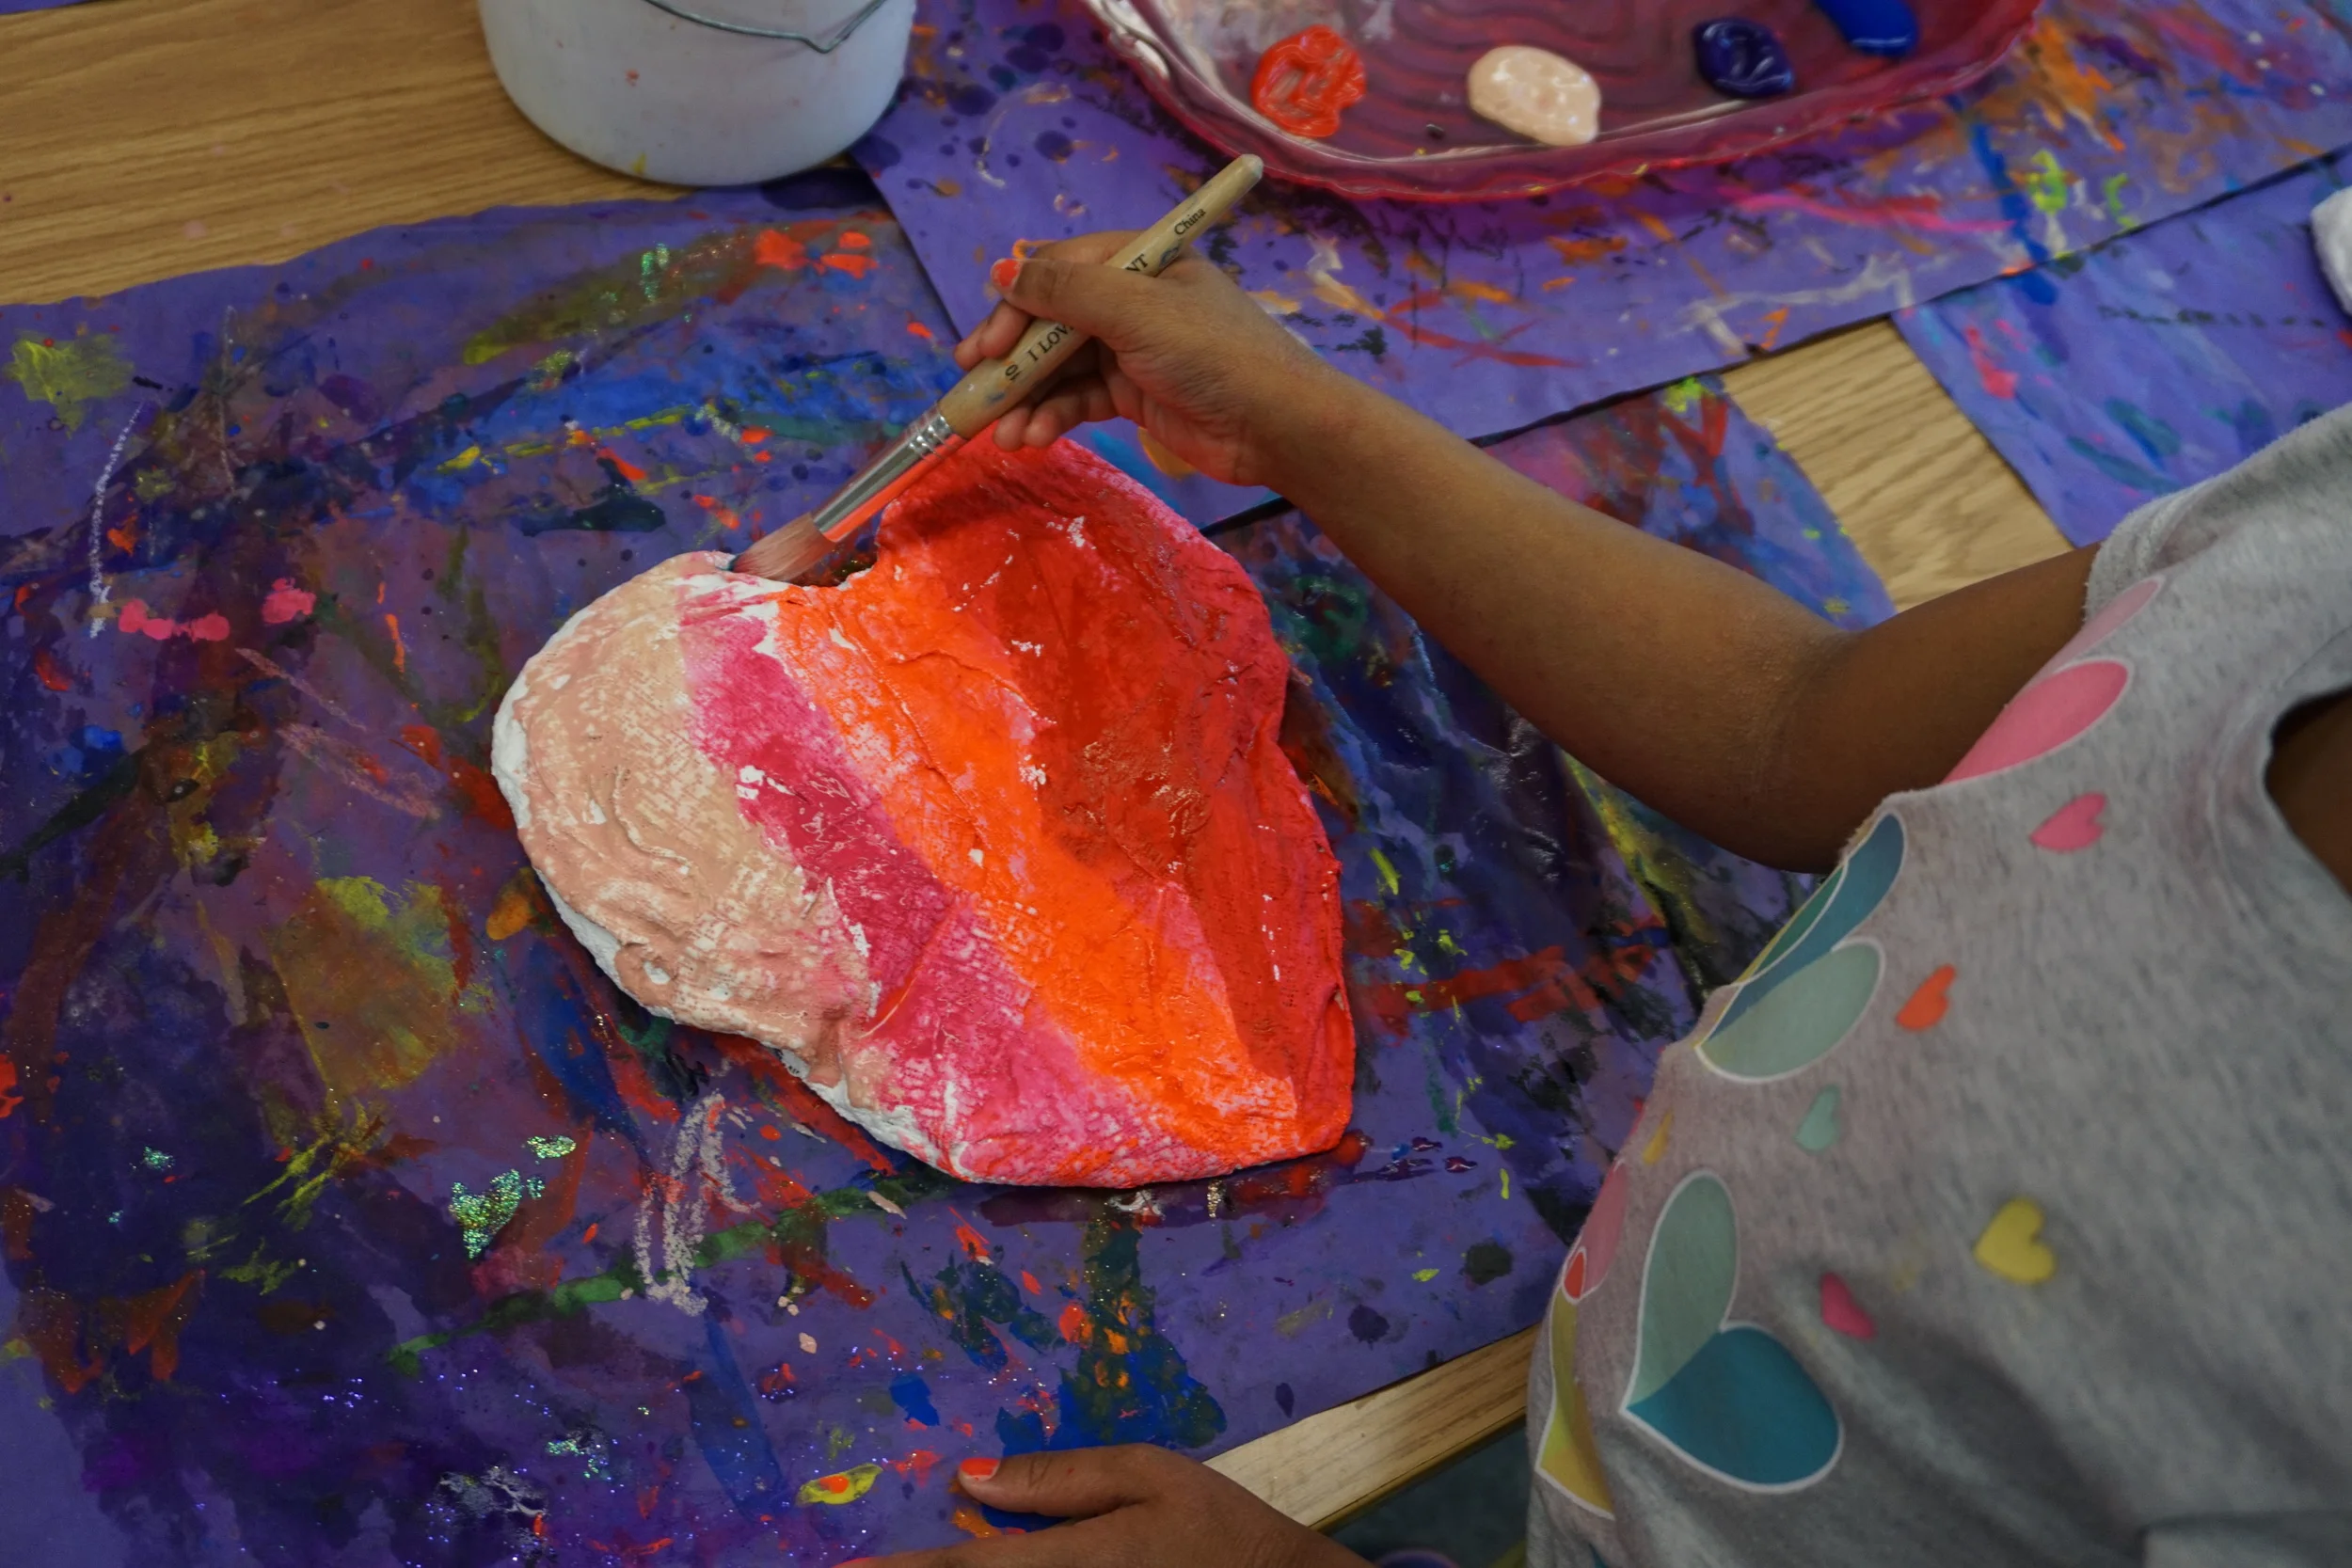
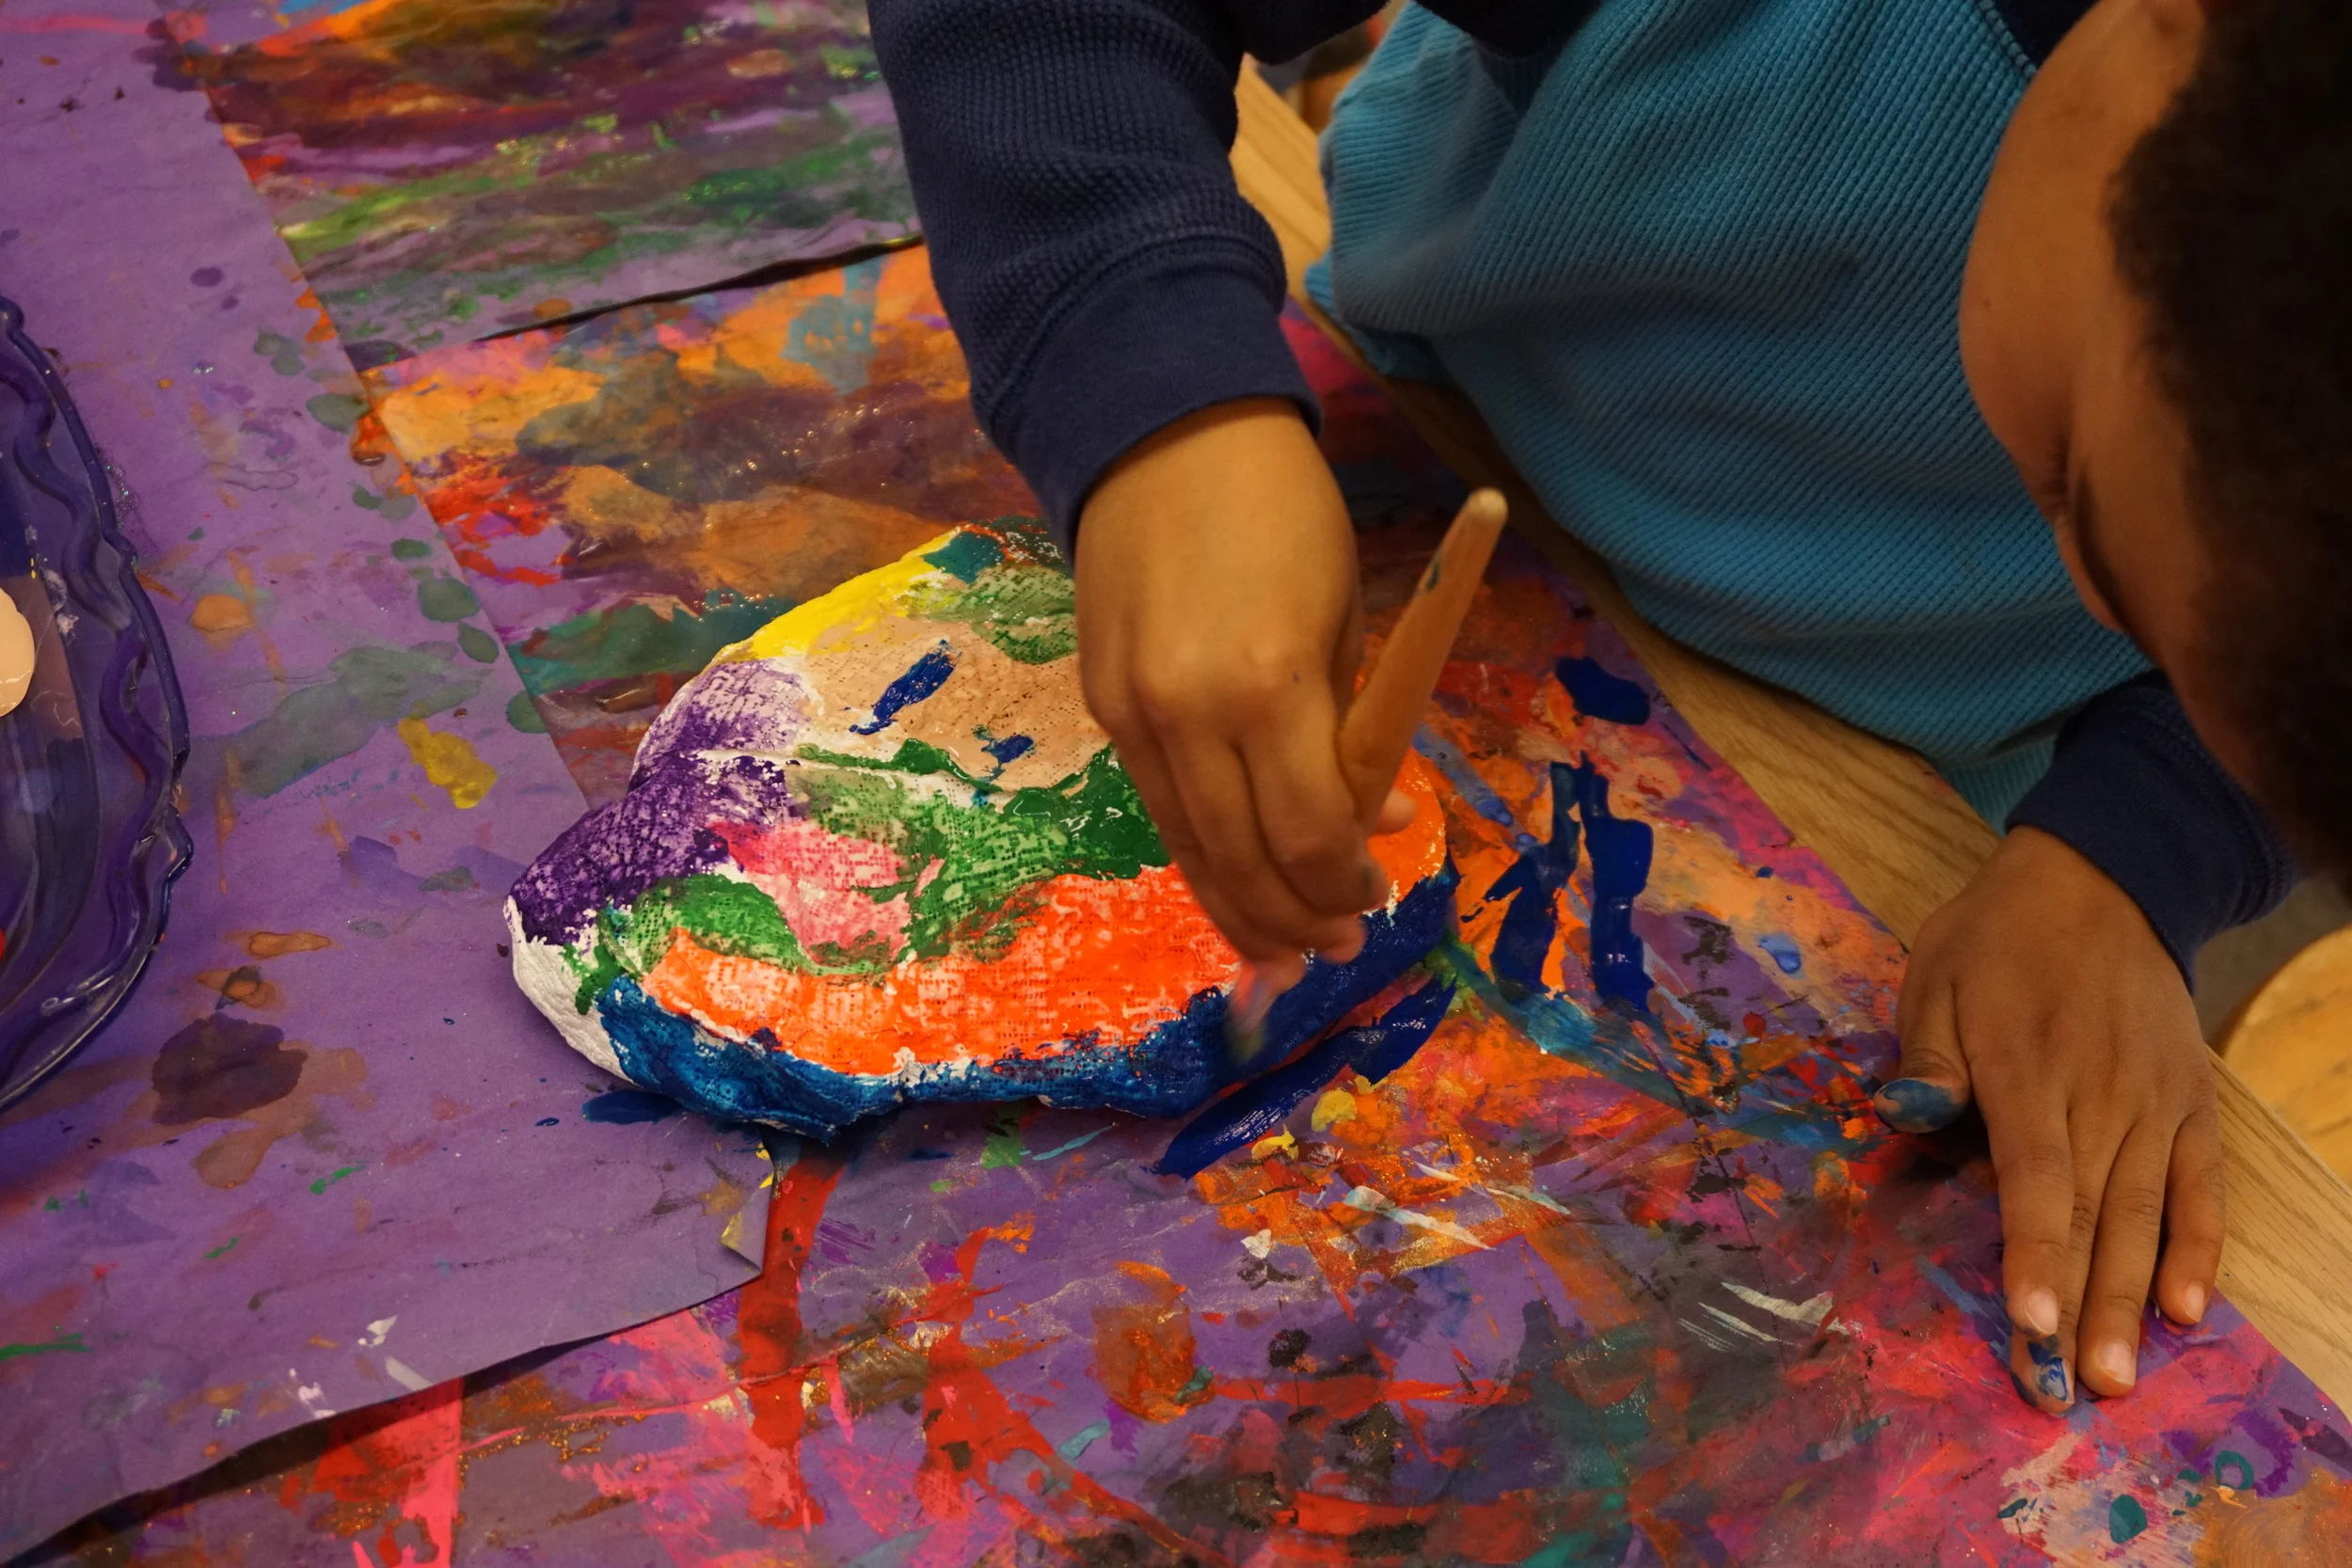
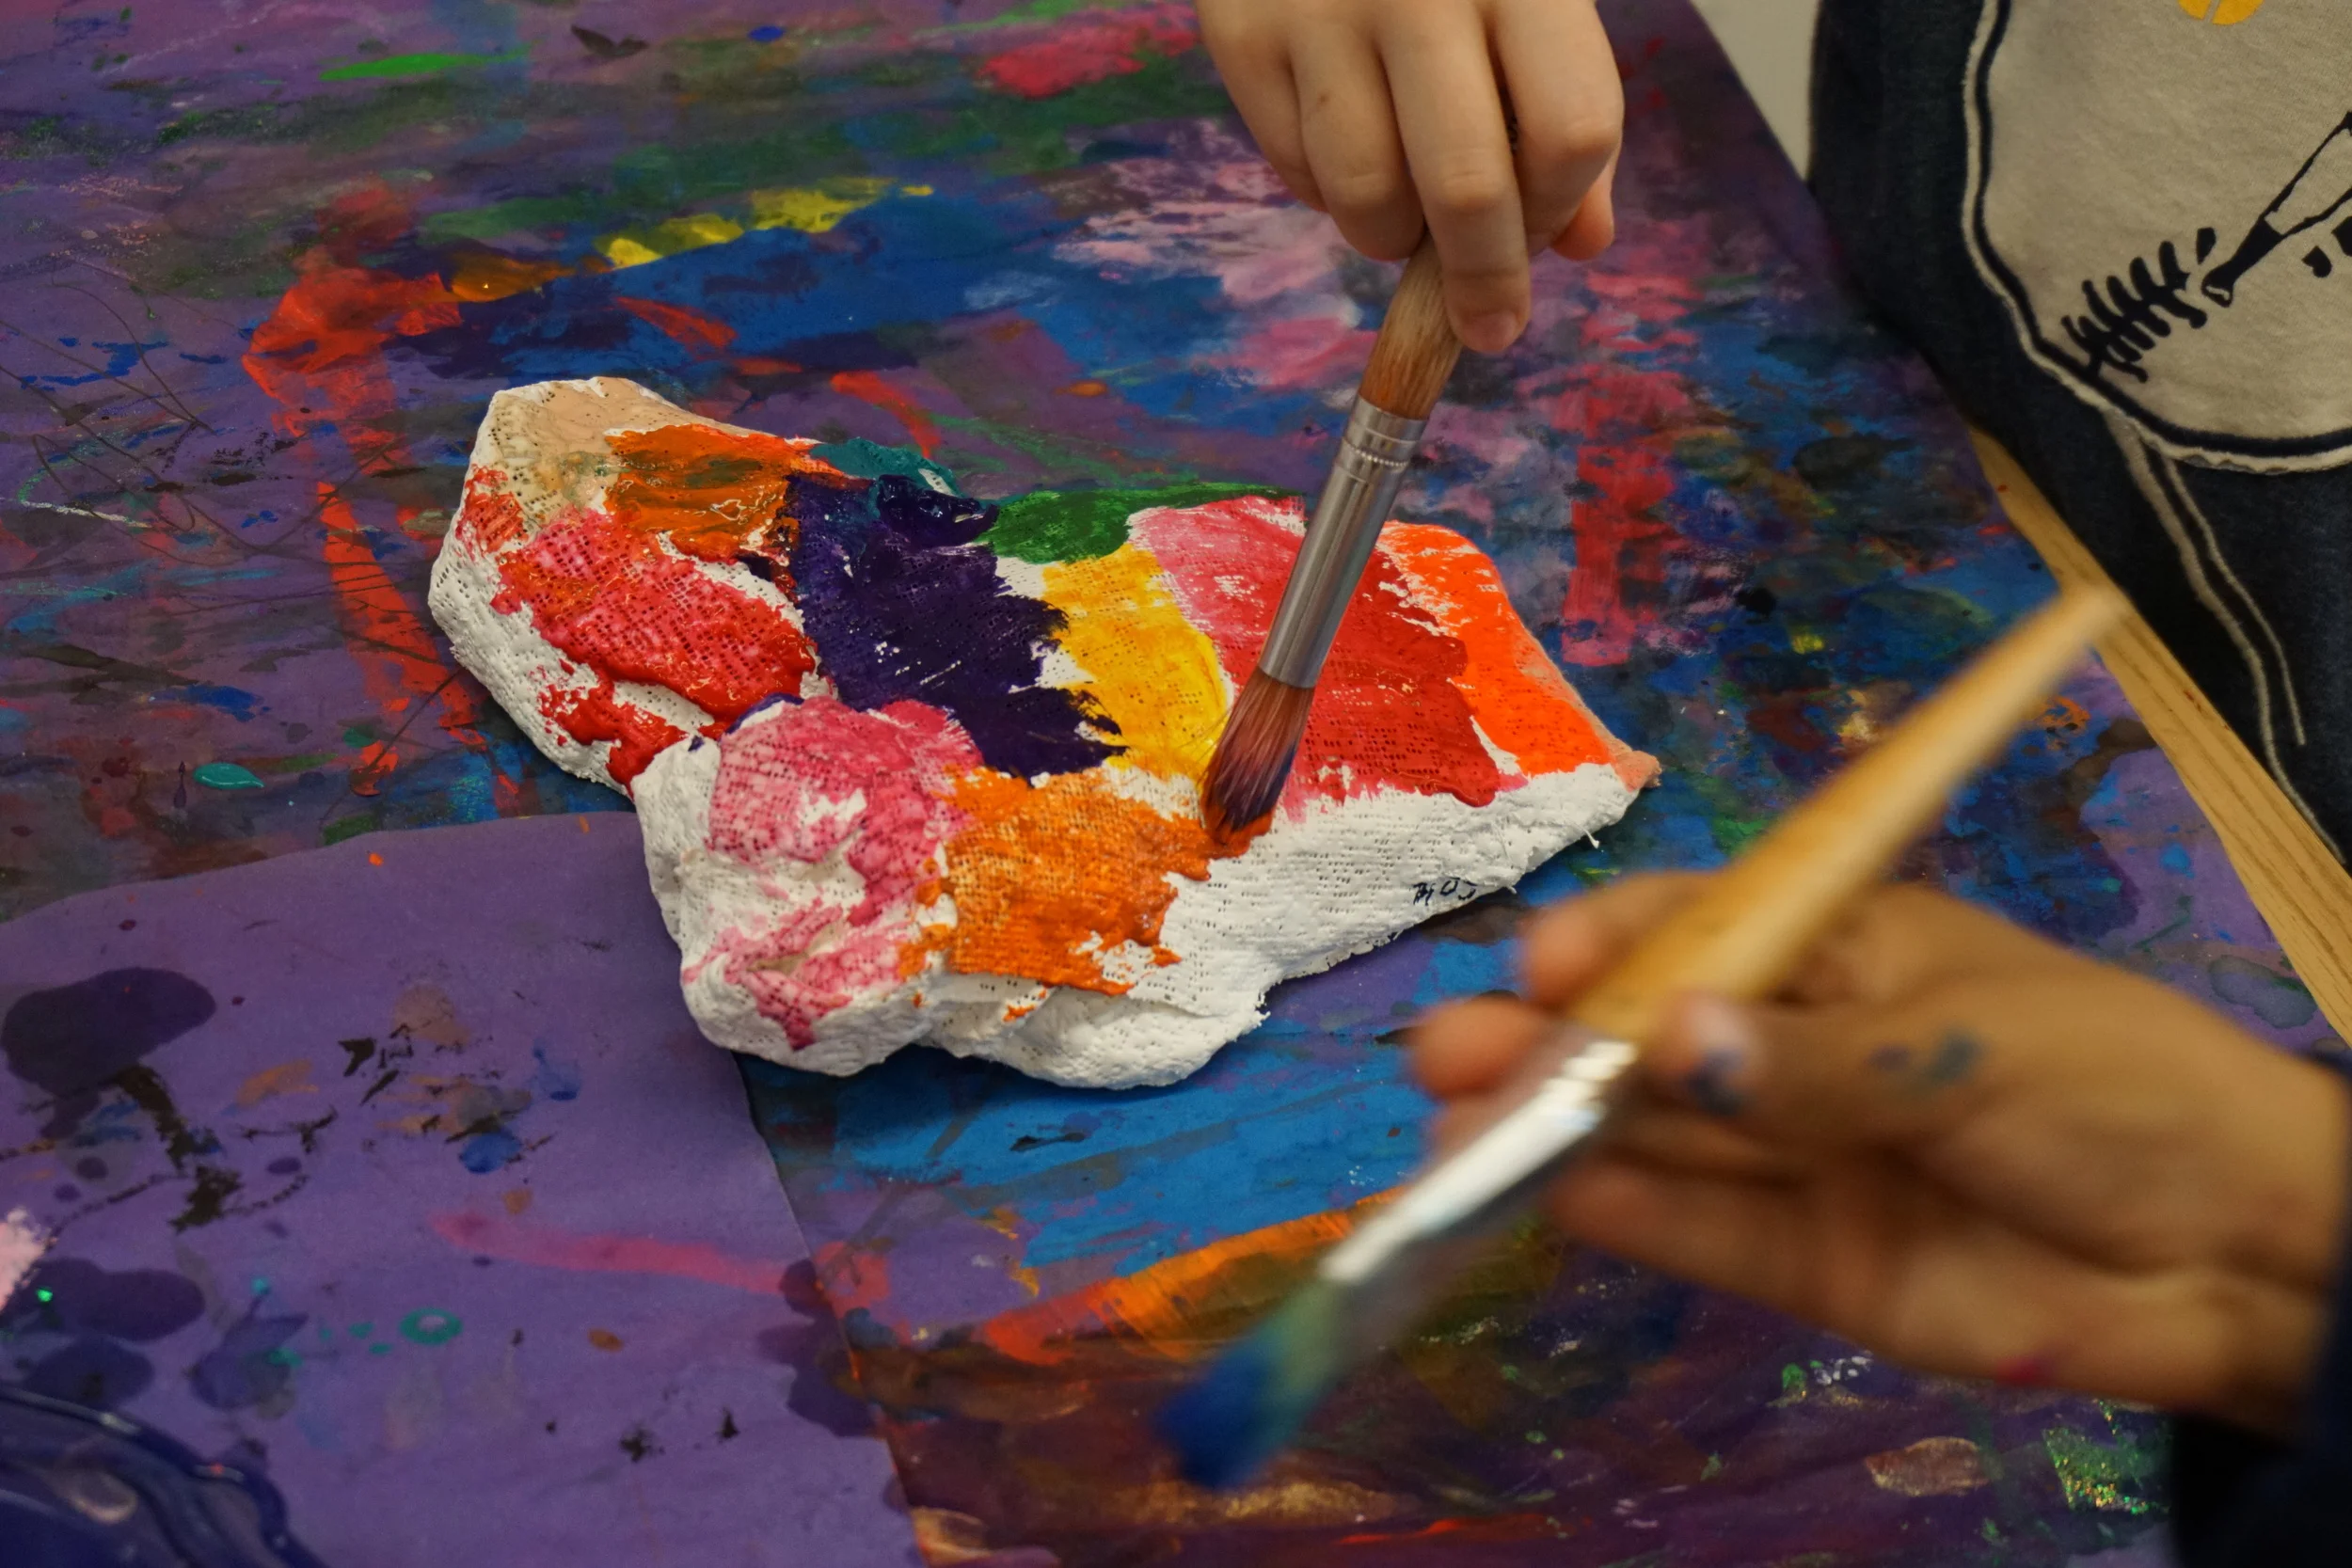
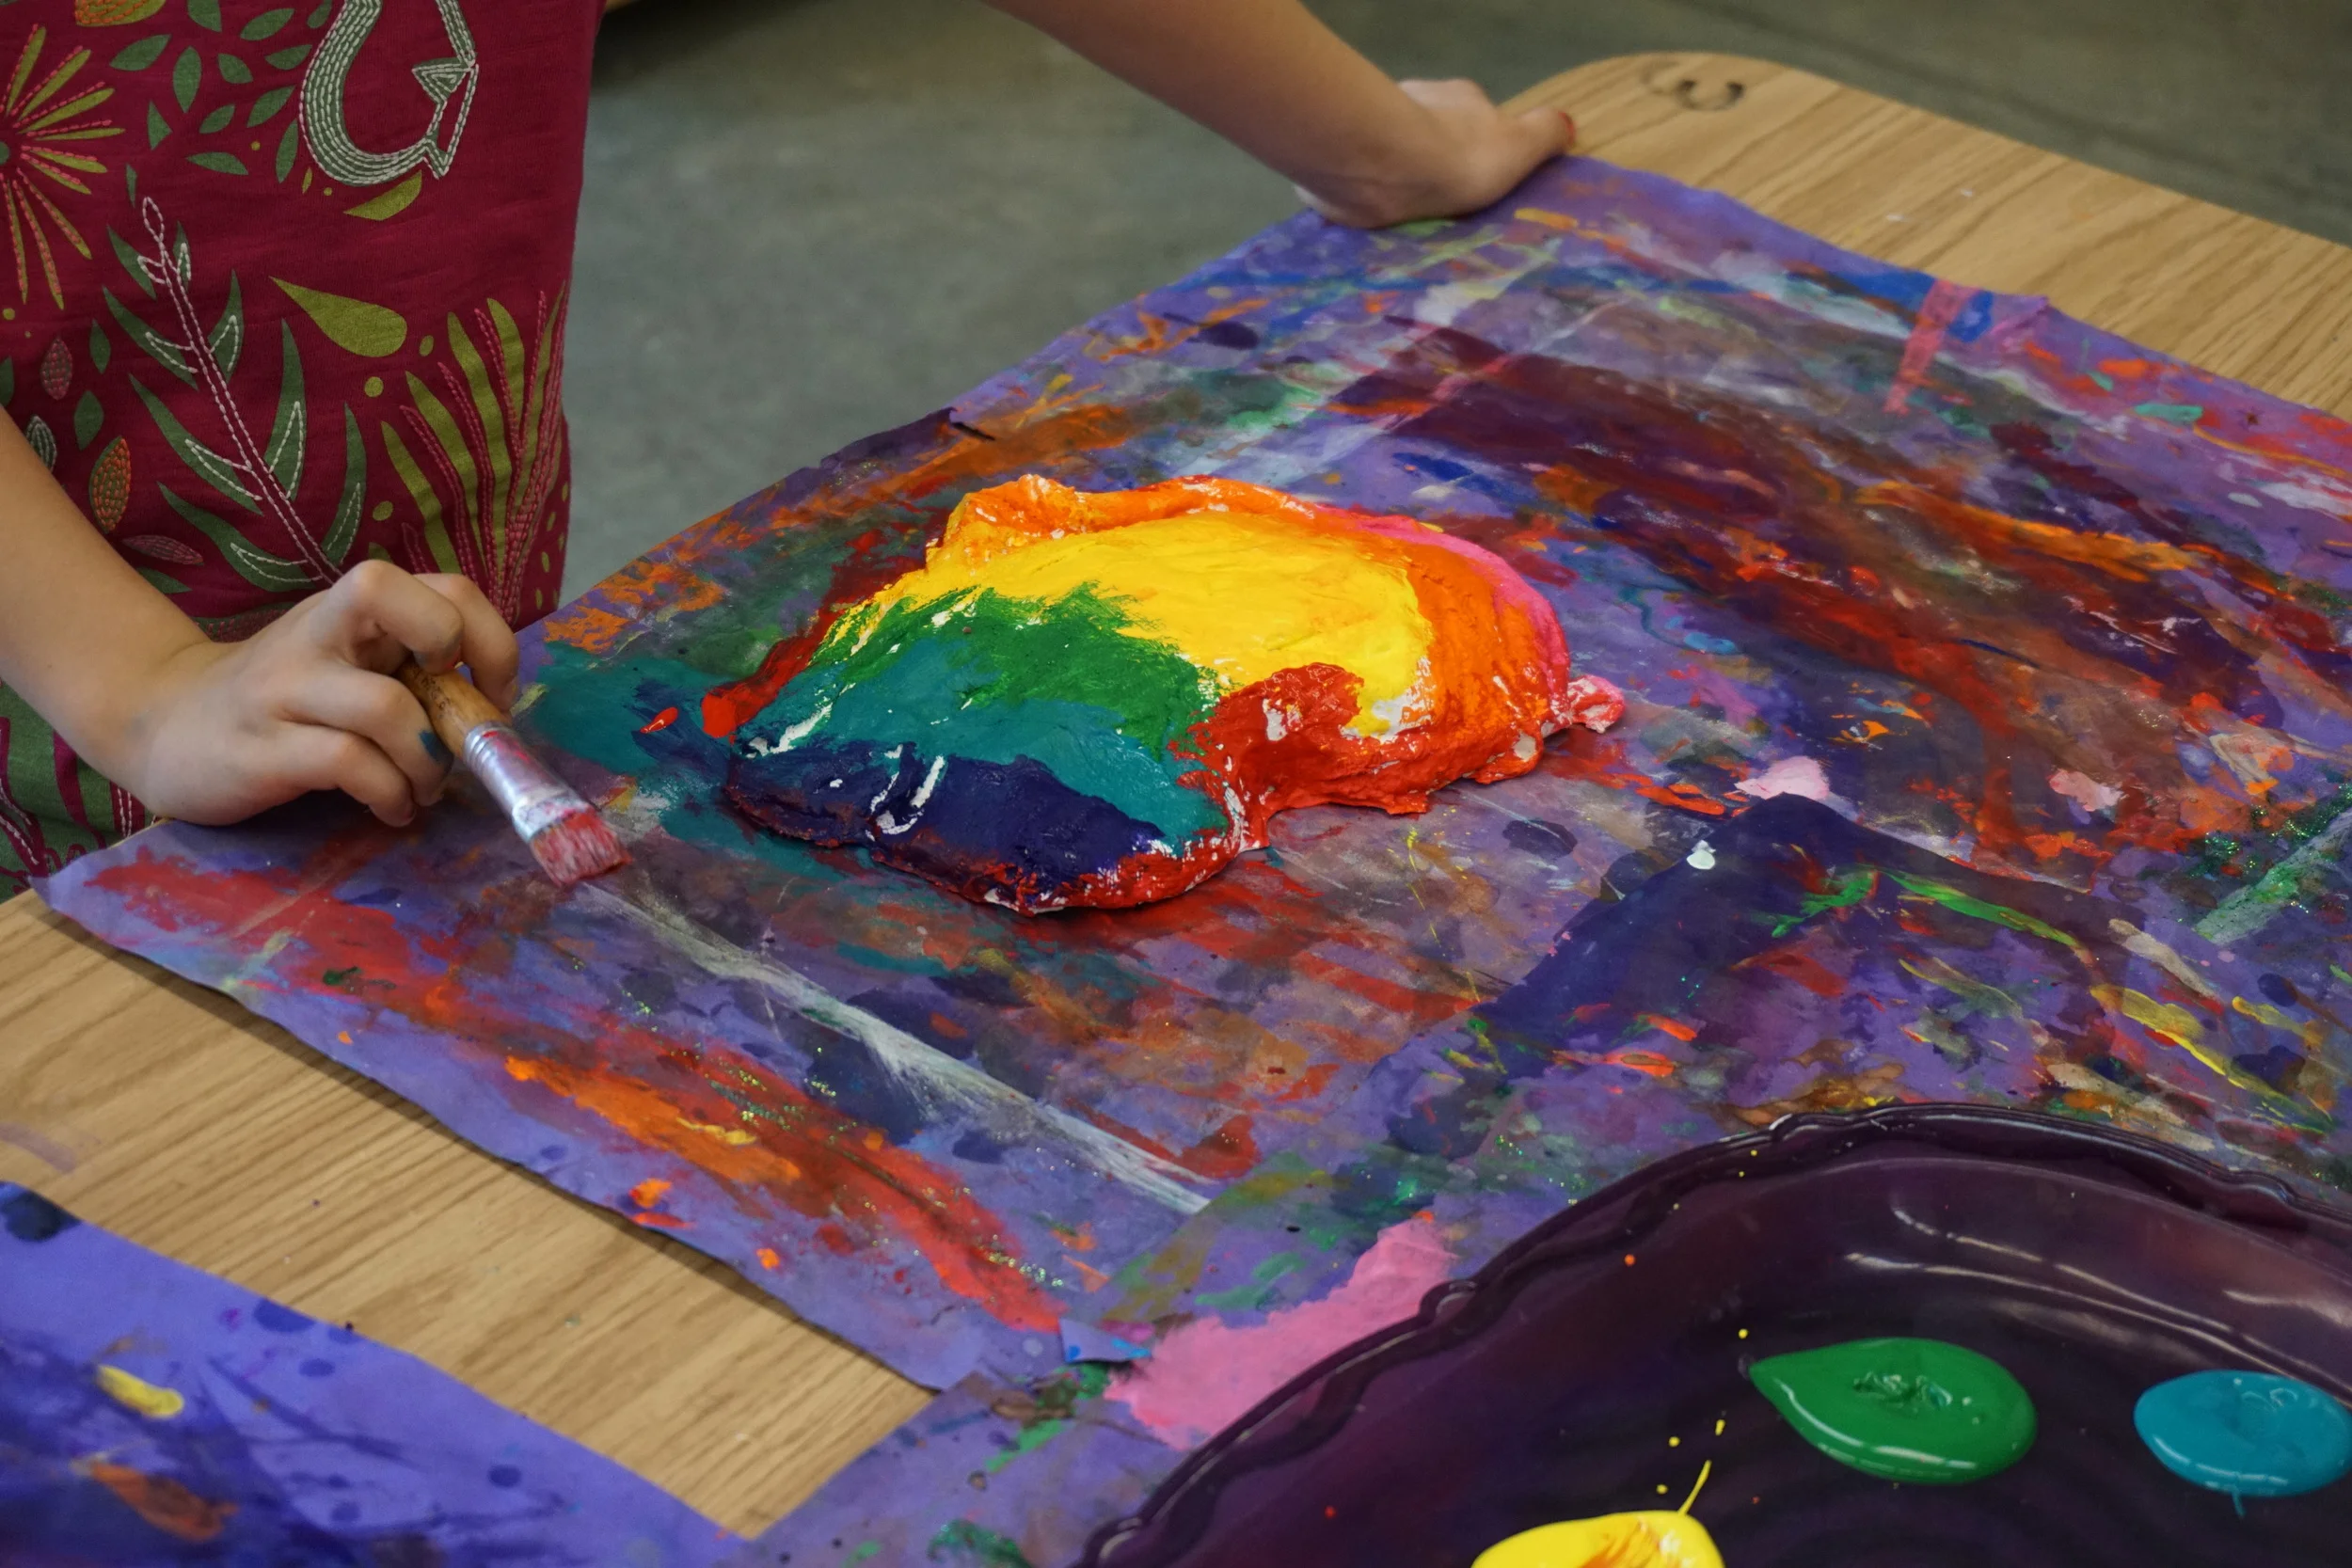
Before we painted we looked back at the images from the previous week. Adding to the original color and texture conversation we looked at how he showed emotion through color and texture. I love when I get to upset the notion that scribbling or messy looking work is bad. Now, that's not to say that I approve of all scribbling and hastily created work, but it's nice to throw them off once in a while.
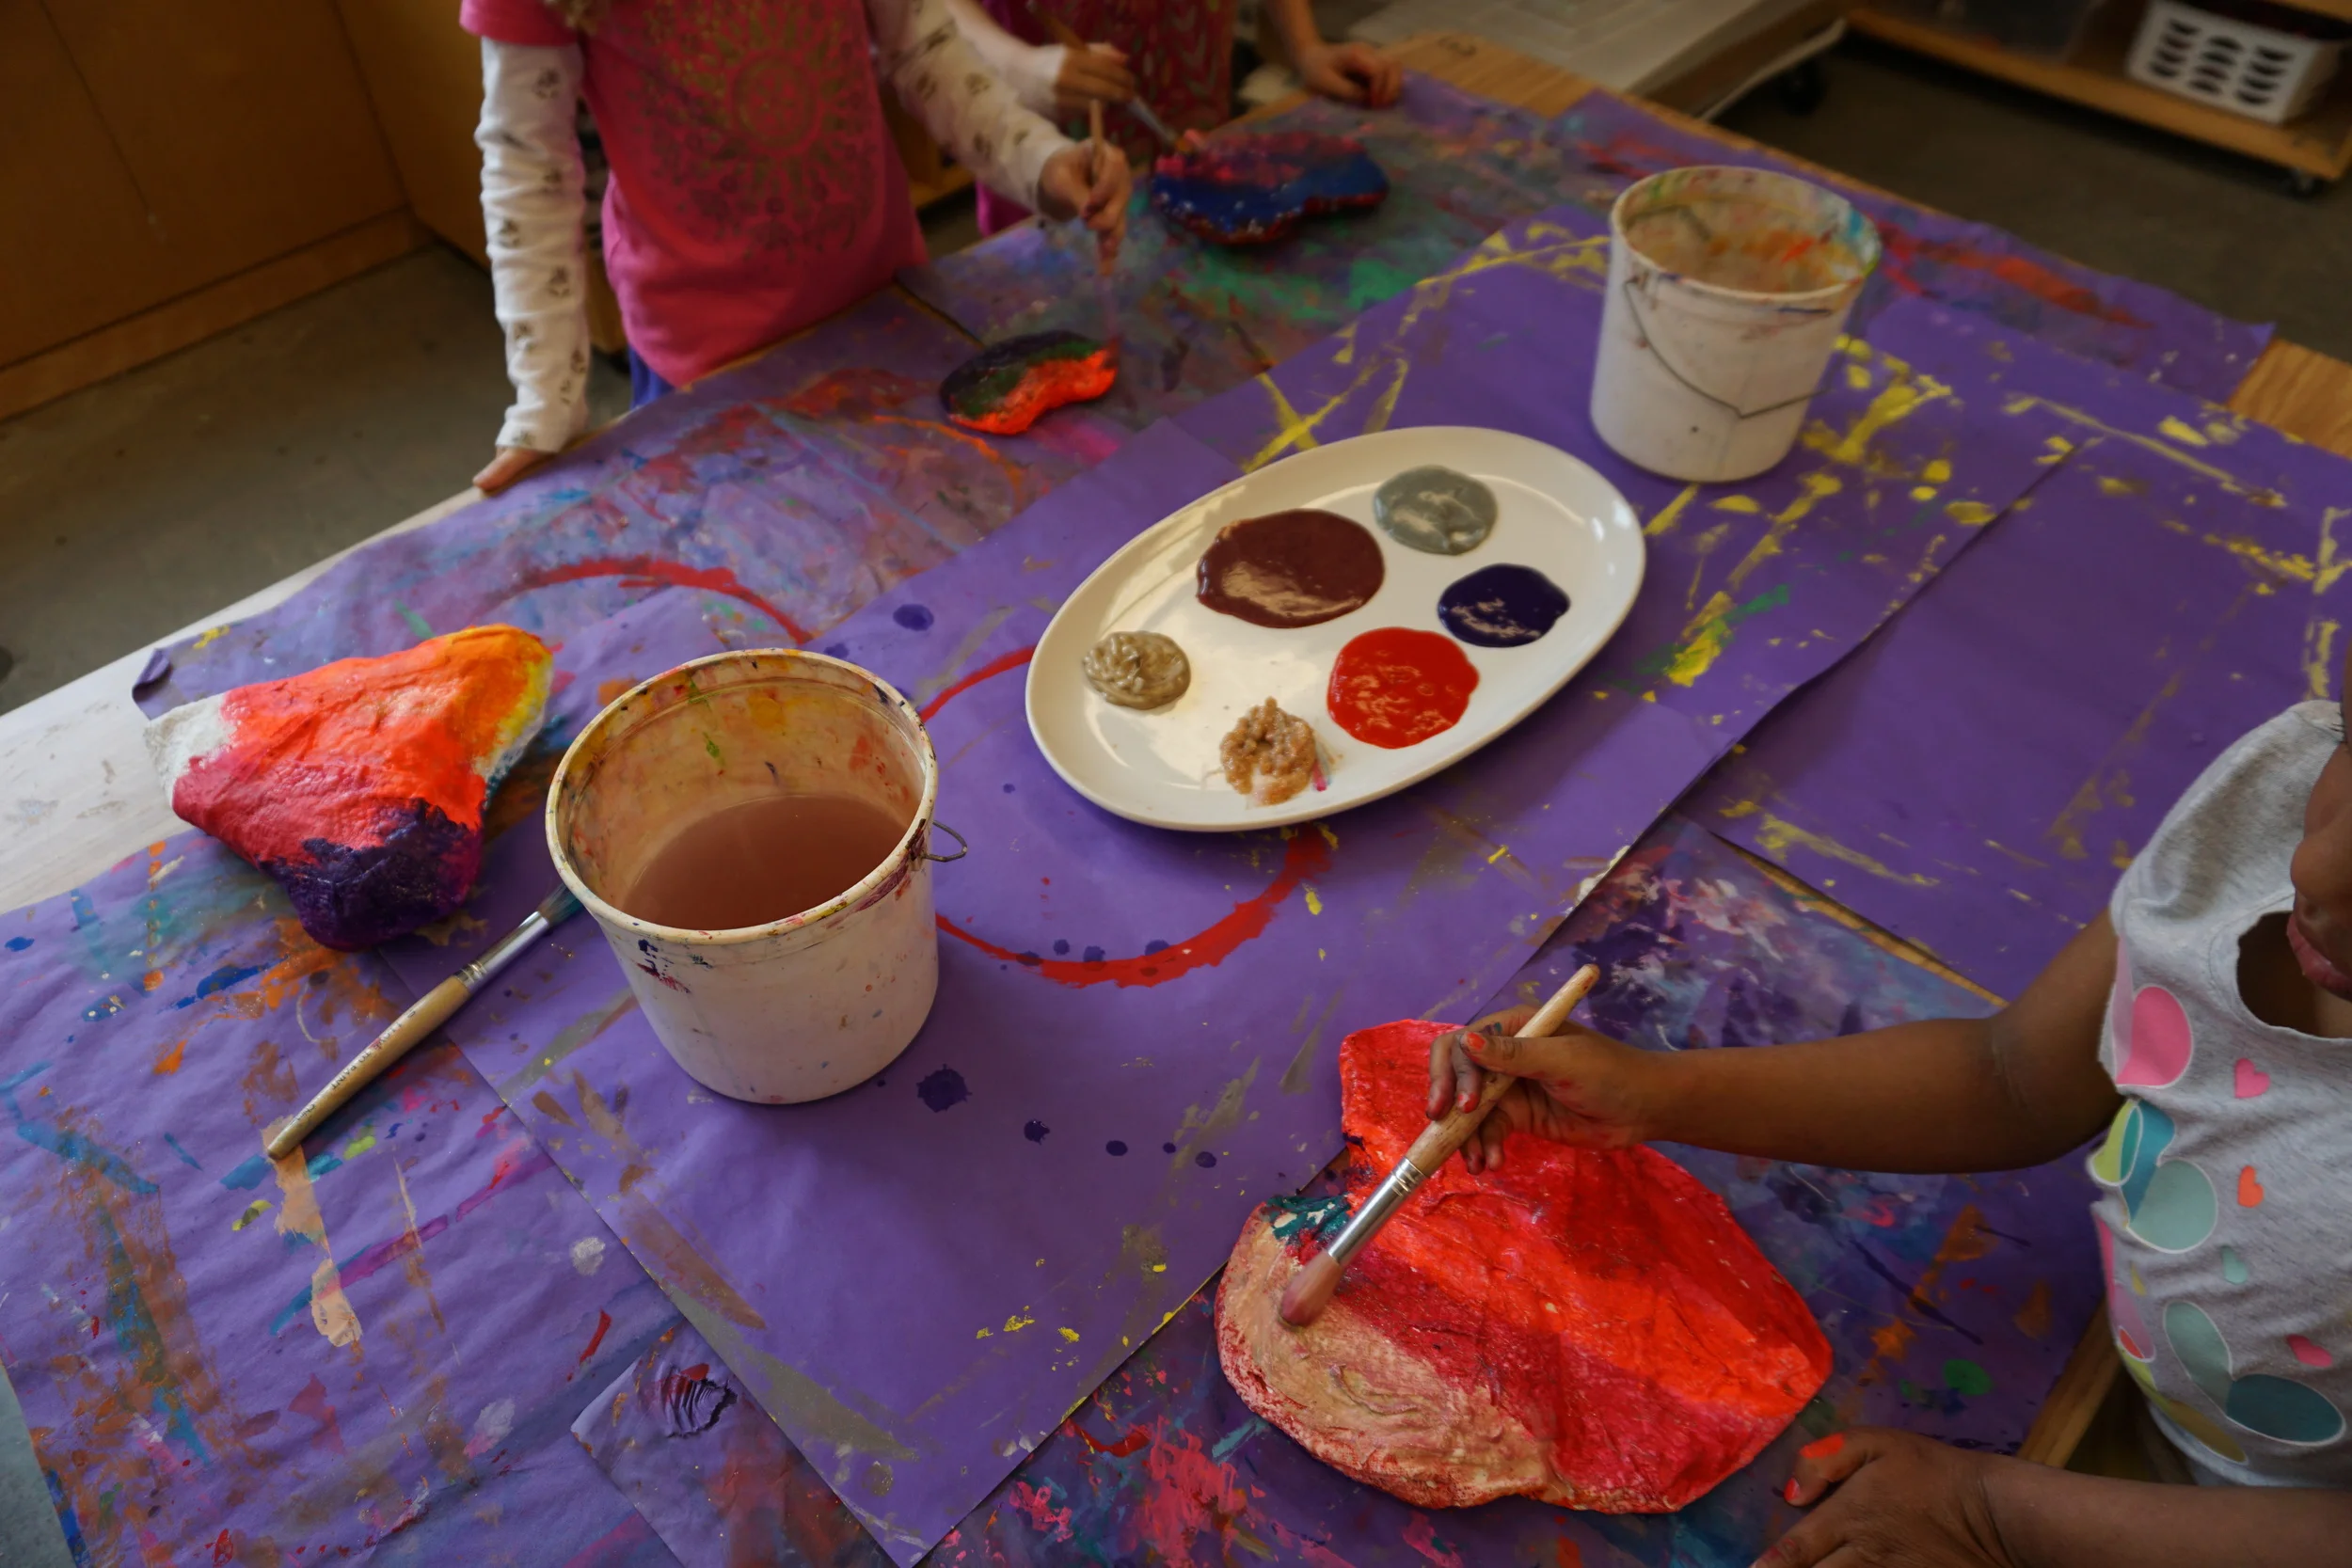
Each table had a tray with about a dozen colors. From this palette students could choose how to paint their heart. Would it look more like "Confetti Heart"? Would they blend their colors or would they not attempt to mix colors? Would they go more warm than cool or vice versa? Their options were only limited by their own minds. Once they had completed the front, back, and sides they could take their heart to the back table and add glitter paint because who doesn't love glitter paint!?
I used stilts that are normally used in the kiln to elevate the hearts so they could dry. When they were ready I drilled a hole in the bottom of the heart and hammered a nail into a small base. Using a drop of super glue to ensure a secure hold, I slid the heart onto the nail to create a standing sculpture. How fun are they?!